- Web templates
- E-commerce Templates
- CMS & Blog Templates
- Facebook Templates
- Website Builders
PrestaShop 1.5. How to manage categories menu
December 3, 2012
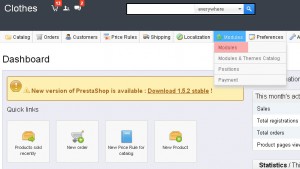
1. Login to your PrestaShop admin panel
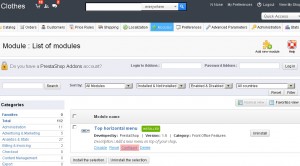
2. Navigate to Modules -> Modules and search for Top horizontal menu
3. Click Configure link to access module configuration
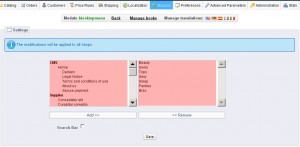
4. Right column is displaying current menu elements and the left one is displaying available menu elements.
5. To add new menu element you should select available element on the left, click Add button and then Save the changes.
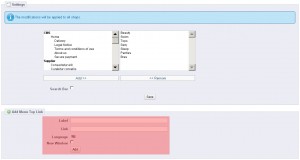
6. You may also add custom links to the menu. Check Add Menu Top Link section.
It allows to add link to external site. You just need to fill in Label and Link fields and click Add button. Then you should search for that element in the left column and add it to right column.
Feel free to check the detailed video tutorial below:
PrestaShop 1.5. How to manage categories menu


