How to Change the WordPress Login Page Without a Plugin
WordPress installations are pretty standardized everywhere. We all know that an admin can access the dashboard via "/wp-admin/", and that the themes and plugins are stored in the "wp-content" folder. Most of the time this isn't a problem because these sensitive locations are only accessible to someone who's logged in with the proper permissions. The one exception? The login page! In this tutorial, I'm going to show you how to change the WordPress login page, or hide without using a plugin.
Why Hide the Login Page?
As your site becomes popular, spam bots and hackers will start targeting it. And the first point of attack is the login page.
Now you might be thinking "I don't mind. I have a strong username and password!". And that's great! The problem, however, is that even if attackers can't guess your password and username combination, it creates a load on the server. Here's the default login page for all WordPress websites:

Merely by accessing wp-login.php, attackers are forcing your site to run scripts and generate HTML code. Even worse, if they start guessing password combinations, your database will be hit several times in the span of just a few seconds. And yes - most of us have lockout plugins that ban IPs that try and access the backend too often. But this won't save you from a distributed attack.
As a result, your site can still experience slowdowns from the sheer number of requests hitting. Ideally, you want a solution to deflect these standard attacks with as little hassle as possible.
I speak from personal experience. DDoS attacks have bombarded my own wp-login.php page, crippling my site. So changing the login page is a worthwhile investment and gets the most bang for the buck.
So let's see how to do this.
The End Result
At the end of this tutorial, we will change your login page from:
example.com/wp-login.php
to
example.com/wp-login.php?newlogin
The "newlogin" parameter can be anything you choose. It'll be known only to you. Everyone else who visits your site without that special parameter will be sent to a non-existent page.
Step 1: Access Your Theme's functions.php
This technique doesn't require you to install any plugins. Instead, we're going to add code to your theme's functions.php file. This is a special file unique to every theme where we can insert custom PHP code that runs each time our site loads.
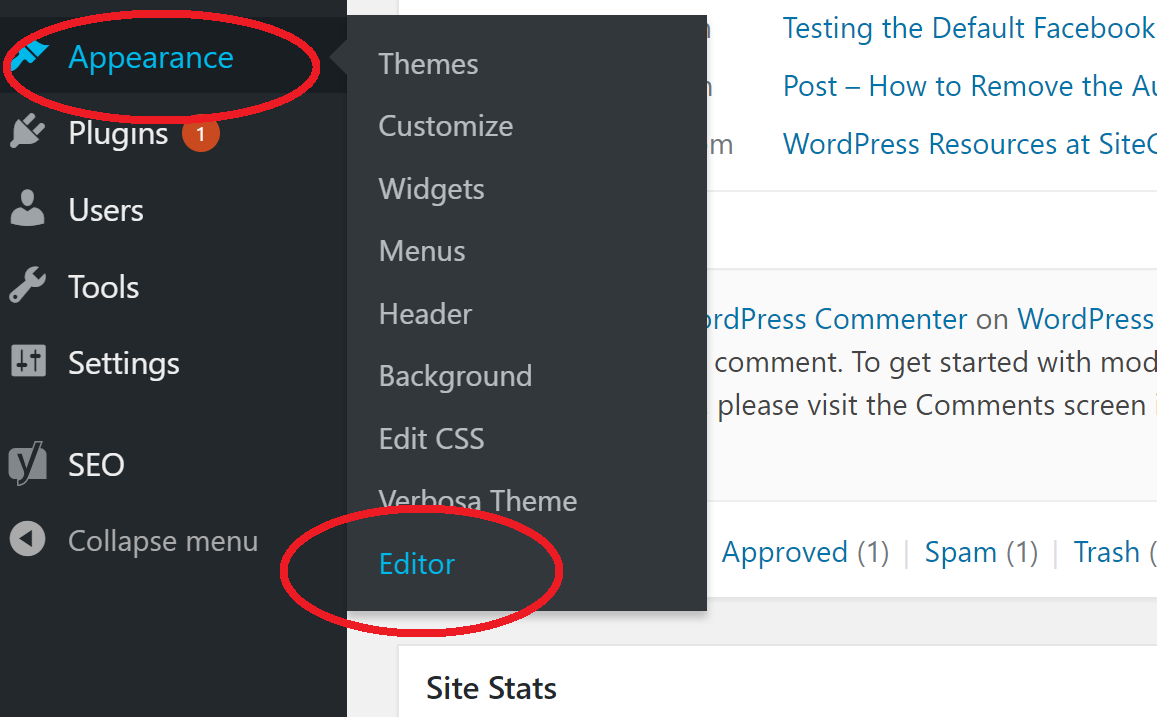
From the WordPress administration dashboard, select Appearance -> Editor as shown here:
If you're doing this for the first time, you'll likely see a warning about editing theme files. Press "I Understand" and continue.
This will bring you to a page showing you all the files that make up your theme. Your current theme will already be selected in the drop-down box as shown here:
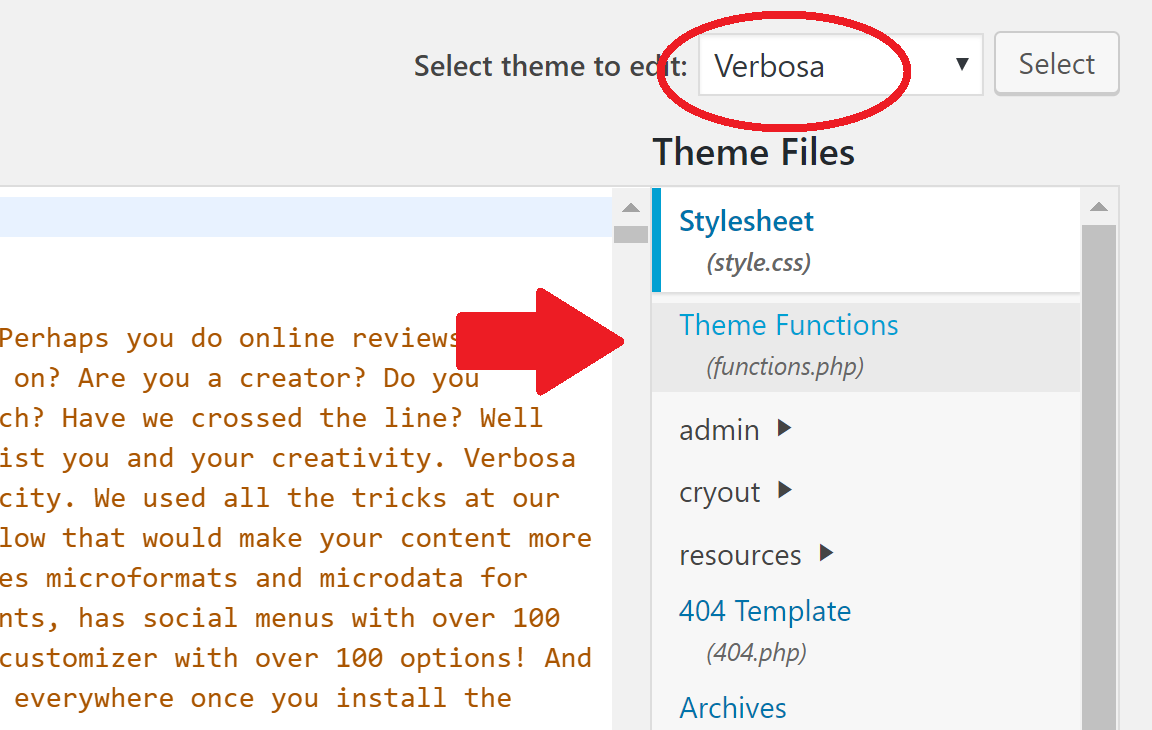
In the list of files below, select "Theme Functions (functions.php)". This will open functions.php in the text editor on the left-hand side for editing.
Step 2: Safely Editing functions.php
A warning here. The functions.php file is linked to your theme and it's dangerous. If something goes wrong, your theme could crash. To avoid this, I recommend one of the following:
- Access functions.php from your cPanel backend instead of through WordPress. This way if your site crashes, you can easily delete the code you just added instead of being locked out.
- Use a separate plugin for custom PHP code. I personally prefer this second option. This way, if something goes wrong, only the plugin will be disabled, and your theme/site will continue working.
Another warning. When the functions.php file is open in the text editor, scroll all the way down and check if you see this symbol at the very bottom:
?>
If you do see it, delete it. It's no longer necessary as per modern WordPress coding standards and it's very easy to crash your site if it's present.
Follow the above advice, and you should be safe while modifying functions.php
Step 3: Adding Code to functions.php
Once functions.php is open in the editor on the left-hand side, paste the following into it:
function redirect_to_nonexistent_page(){

     $new_login=  'newlogin';
    if(strpos($_SERVER['REQUEST_URI'], $new_login) === false){
                wp_safe_redirect( home_url( 'NonExistentPage' ), 302 );
      exit();
    }
 }
add_action( 'login_head', 'redirect_to_nonexistent_page');

function redirect_to_actual_login(){

  $new_login =  'newlogin';
  if(parse_url($_SERVER['REQUEST_URI'],PHP_URL_QUERY) == $new_login&& ($_GET['redirect'] !== false)){
                 wp_safe_redirect(home_url("wp-login.php?$new_login&redirect=false"));
     exit();

  }
}
add_action( 'init', 'redirect_to_actual_login');
There are two items in bold in the above code. This is the custom slug that you choose to access your login page. Replace it with something of your choice. Something that's not easy for anyone to guess.
Here's what it looks like with the code added to functions.php
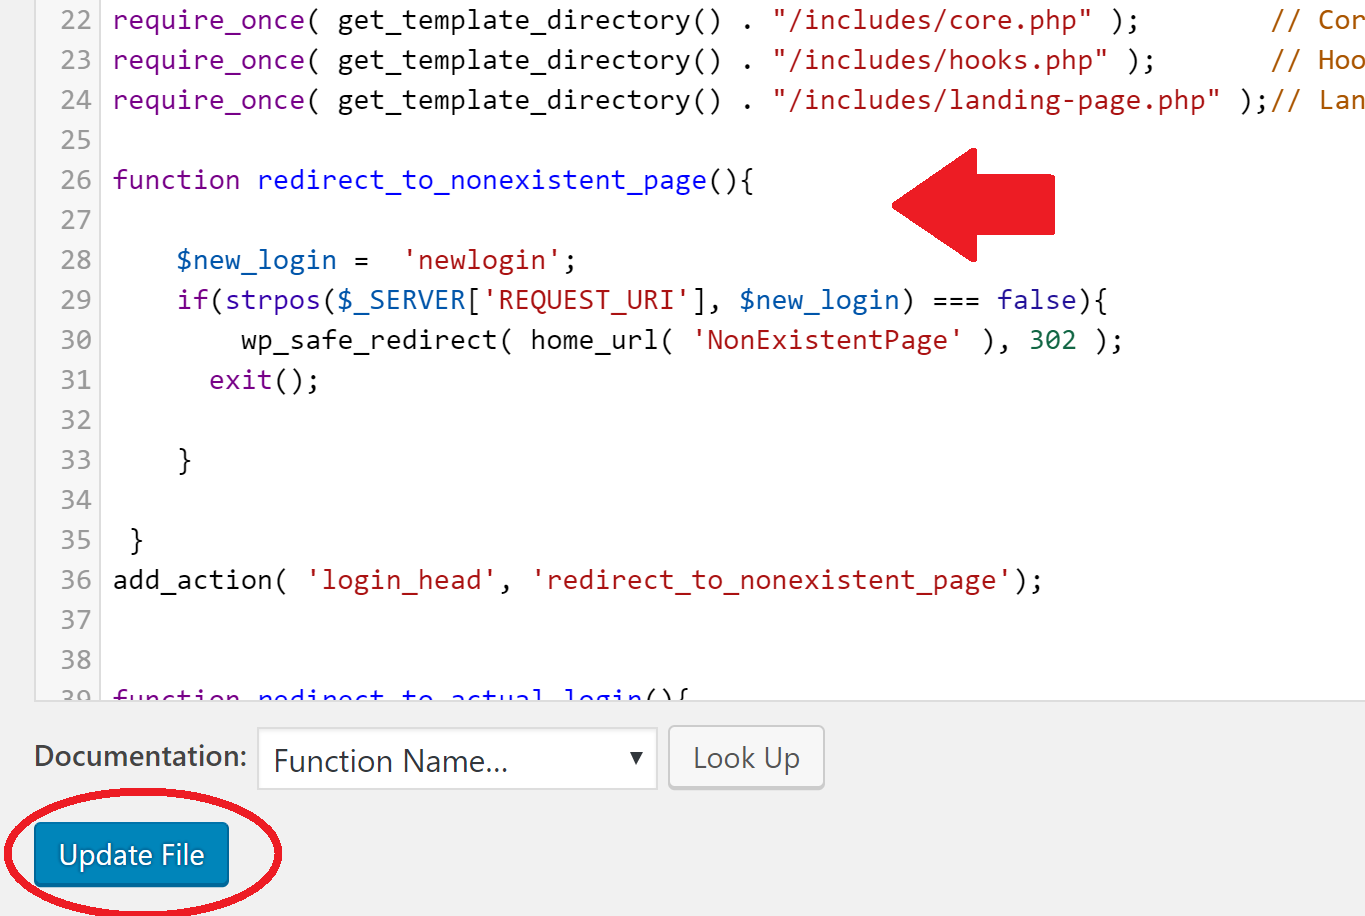
Once inserted and modified, click the blue "Update File" button as shown above.
Step 4: Accessing Your Login Page
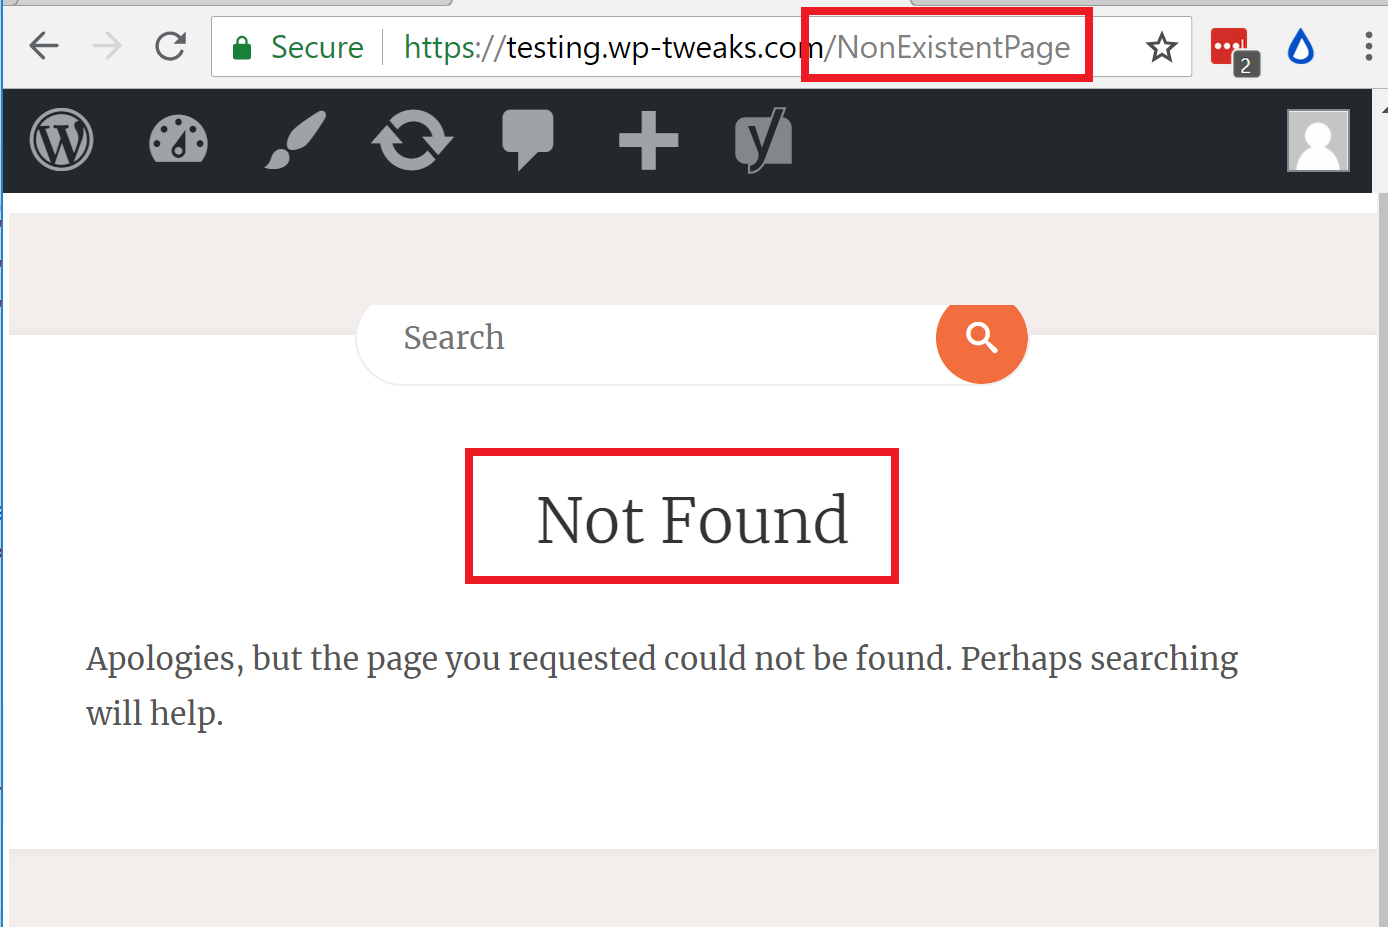
If everything goes well, you shouldn't be able to access your login page via wp-login.php anymore. If you try, you'll be redirected to a non-existent page like this:
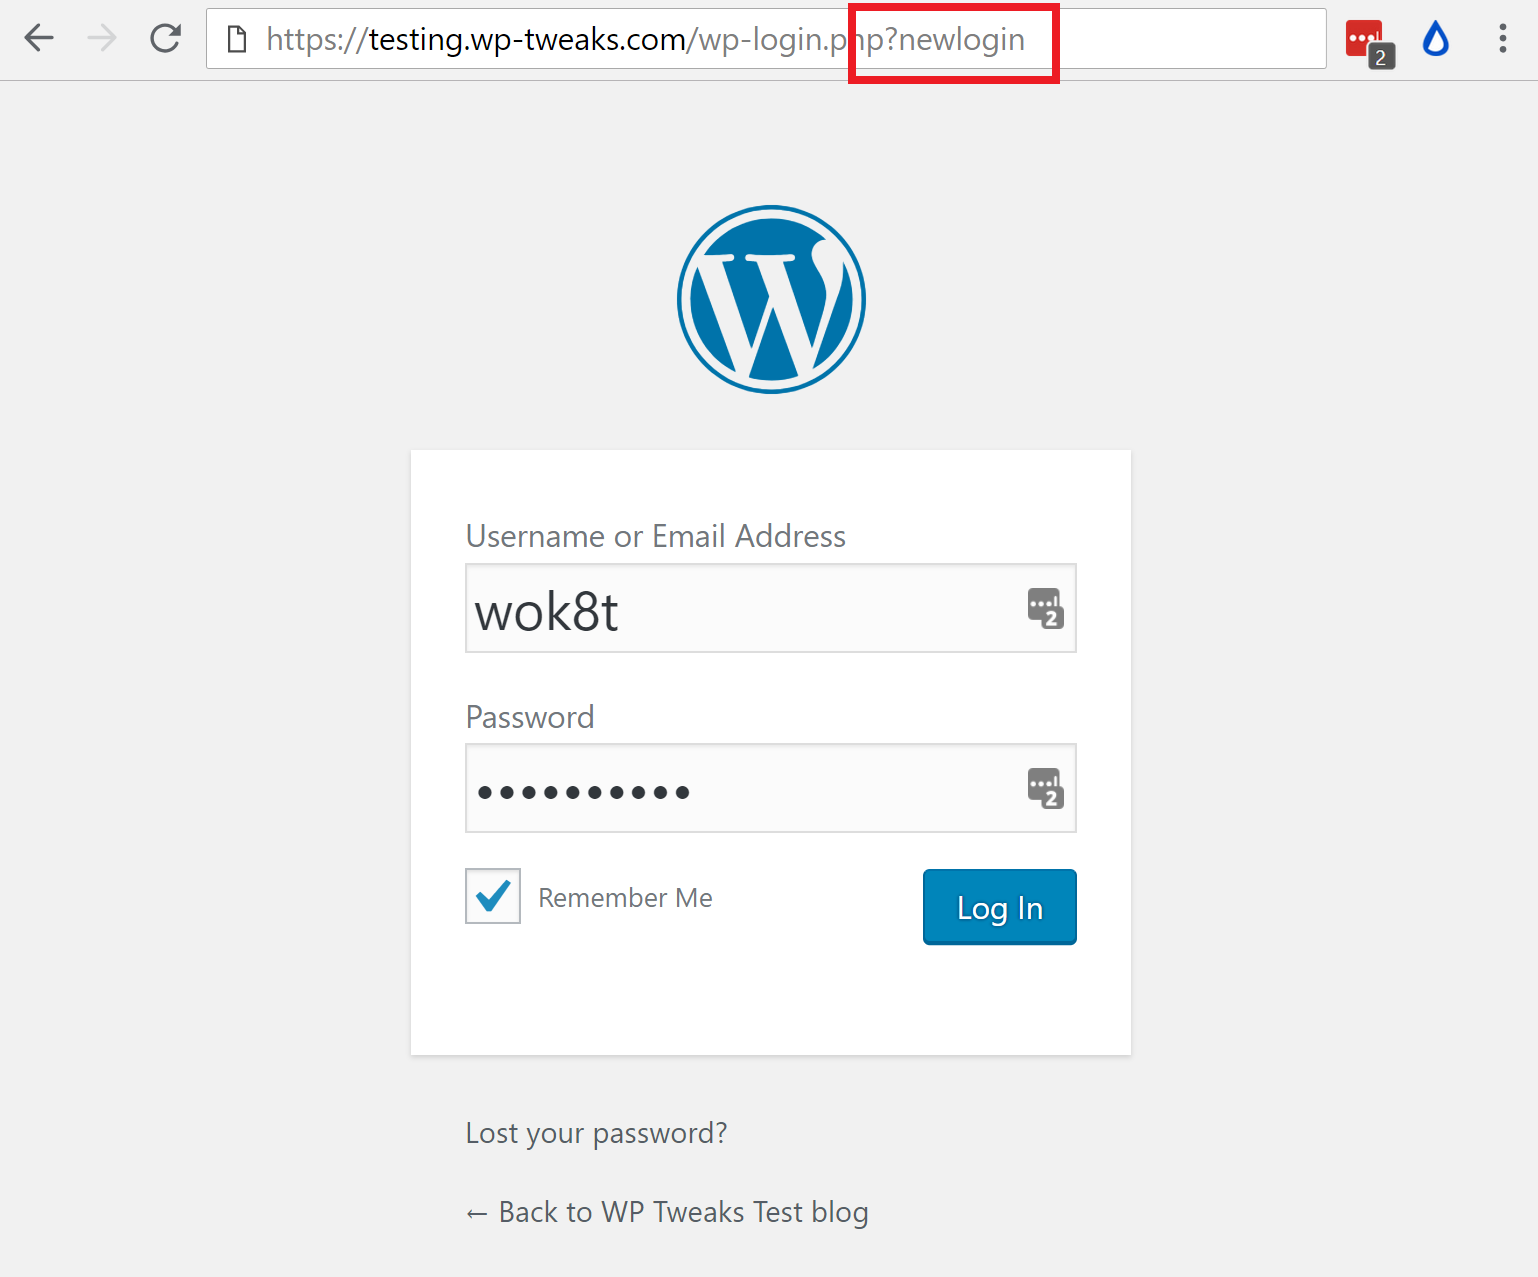
Instead, access your login page like this:
example.com/wp-login.php?newlogin
Replace newlogin with whatever slug you chose in Step 3. Now your login page will be visible like this:
And that's it! You've successfully managed to change your wp-login.php page and made it so that hackers can't access it anymore!
Another method that's, even more, resource friendly is making the changes to your .htaccess file so that visitors are redirected from there. But .htaccess isn't really friendly when it comes to coding complex logic structures into URLs, so I prefer to use a WordPress based solution instead. Plus, it's portable and a lot less scary to modify functions.php compared to .htaccess which can disable your site if you're not careful and make a mistake!
Read Also
How to Create a Sticky Menu on WordPress
WordPress Gutenberg is Close to Becoming a Default Editor
Top 15 WordPress SEO Mistakes to Avoid
Jupiter 5 vs. Monstroid 2: Cosmic WordPress Themes to Give You Goosebumps
Don’t miss out these all-time favourites
- The best hosting for a WordPress website. Tap our link to get the best price on the market with 82% off. If HostPapa didn’t impress you check out other alternatives.
- Website Installation service - to get your template up and running within just 6 hours without hassle. No minute is wasted and the work is going.
- ONE Membership - to download unlimited number of WordPress themes, plugins, ppt and other products within one license. Since bigger is always better.
- Ready-to-Use Website service is the ultimate solution that includes full template installation & configuration, content integration, implementation of must-have plugins, security features and Extended on-page SEO optimization. A team of developers will do all the work for you.
- Must-Have WordPress Plugins - to get the most essential plugins for your website in one bundle. All plugins will be installed, activated and checked for proper functioning.
- Finest Stock Images for Websites - to create amazing visuals. You’ll get access to Depositphotos.com to choose 15 images with unlimited topic and size selection.
- SSL Certificate Creation service - to get the absolute trust of your website visitors. Comodo Certificate is the most reliable https protocol that ensures users data safety against cyber attacks.
- Website speed optimization service - to increase UX of your site and get a better Google PageSpeed score.

Posting contributed articles about the major web design highlights and novelties. Come across a handful of useful tutorials and guides shared by experts in the web design and online marketing fields.
Get more to your email
Subscribe to our newsletter and access exclusive content and offers available only to MonsterPost subscribers.

Leave a Reply
You must be logged in to post a comment.