- Web templates
- E-commerce Templates
- CMS & Blog Templates
- Facebook Templates
- Website Builders
PrestaShop 1.6.x. How to manage header and footer links
May 15, 2014
The following tutorial is going to show you how to manage header and footer links in PrestaShop 1.6.x templates.
PrestaShop 1.6.x. How to manage header and footer links
-
Header links
-
The header links of the PrestaShop template are defined by the Permanent links block module.
If you want to add an element to it or remove it, you should edit the themes/themeXXX/modules/blockpermanentlinks/blockpermanentlinks-header.tpl file located in your PrestaShop installation on your hosting server.
-
Open the file using any code editor. The menu is created as an unordered list. Each menu element is wrapped into <li> </li> tags.
-
For example, the following lines of code represent the Sitemap menu element:
<li id="header_link_sitemap"><a href="{$link->getPageLink('sitemap')|escape:'html'}" title="{l s='sitemap' mod='blockpermanentlinks'}">{l s='sitemap' mod='blockpermanentlinks'}</a></li>a href="{$link->getPageLink('sitemap')|escape:'html'}" - is the URL to the page{l s='sitemap' mod='blockpermanentlinks'} - is the code for displaying the button name -
To add a link to the Best Sellers page (http://yourdomain.com/best-sales.php), you should add the following line of code to the themes/themeXXX/modules/blockpermanentlinks/blockpermanentlinks-header.tpl file.
<li id="header_link"> <a href="{$link->getPageLink('best-sales.php')|escape:'html':'UTF-8'}" title="{l s='best-sales' mod='blockpermanentlinks'}"> {l s='Best sales' mod='blockpermanentlinks'}</a></li>Note: If you want to change the name of the new button or add its translations, you can do it in Localization -> Translations menu of your back end. For more details, feel free to check the PrestaShop 1.6.x. How to edit menu titles video tutorial.
-
To add a link to some CMS page, you should get the link to the page first. Let’s add the link to About Us page. It is http://templatetesting.com/vincent/index.php?id_cms=4&controller=cms&id_lang=1 .
You should edit the themes/themeXXX/modules/blockpermanentlinks/blockpermanentlinks-header.tpl file and add the following line of code:
<li><a href="{$link->getCMSLink('4', 'CMSpage')}" title="{l s='about-us' mod='blockpermanentlinks'}">{l s='About Us' mod='blockpermanentlinks'}</a></li>$link->getCMSLink(’4′, ‘CMS page’) means that we want to load the CMS page with ID 4. You can see that in the page URL. s=’About Us’ is a button title.
-
Save the changes and check your website front end to see how you modified the header menu.
-
-
Footer links
-
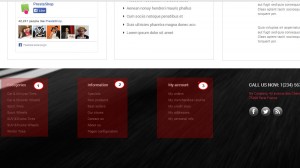
Let’s check what modules are used to display links in the footer of the site.
-
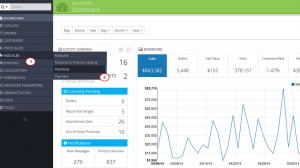
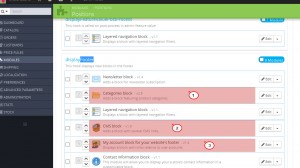
Log into the PrestaShop admin panel. Navigate to Modules -> Positions
and look for the displayFooter hook.
-
Here we can see the modules representing our links blocks in the footer:
-
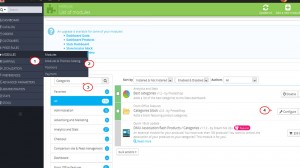
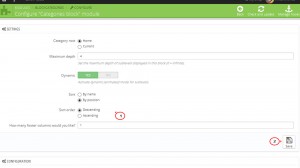
Categories block – this module automatically shows the categories you have in Catalog->Categories. You can edit such options as category root, maximum depth, dynamic (animated) mode for sublevels, sort by, sort order and footer columns in the Modules->Modules-> Categories block ->Configure menu.
-
CMS block – the block where you can add links to CMS pages, some store pages and custom links to external resources.
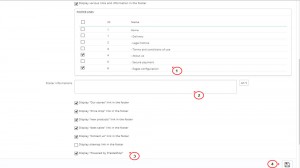
To edit this module, navigate to the Modules->Modules-> CMS block ->Configure menu. There you will find the following options:
-
Display various links and information in the Footer – the option to enable/disable a links block in the footer.
-
Footer links – choose links to CMS pages from Preferences->CMS you want to show.
-
Footer information – the field for custom text. You can use HTML tags there. If you want to add some custom link (for instance, to Google), use the following code:
<a target="_blank" href="https://www.google.com/">Google</a>
Replace https://www.google.com/ with the required URL and use the title you need instead of Google.
-
Various links in the footer – here you can see the option to enable/disable links to “Our stores,” “Price drop,” “New products,” “Best sales,” “Contact us,” sitemap pages and copyright notification.
-
Click the Save button to save your information block configuration.
-
-
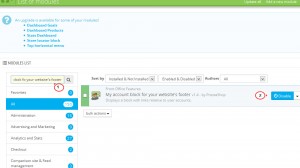
My account block for your website’s footer – displays a block with links relative to user accounts. You can enable or disable that block under Modules -> Modules in your PrestaShop admin panel.
If you want to add/remove links to it, you need to edit the /themes/themeXXX/modules/blockmyaccountfooter/blockmyaccountfooter.tpl file on your FTP. The syntax is the same as in the themes/themeXXX/modules/blockpermanentlinks/blockpermanentlinks-header.tpl file.
-
-
Feel free to check the detailed video tutorial below:
PrestaShop 1.6.x. How to manage header and footer links
If you already have an html based website with admin panel and need some other type of a template, review our Bootstrap Admin Themes.


