


- Web templates
- E-commerce Templates
- CMS & Blog Templates
- Facebook Templates
- Website Builders
FAQs
General Tutorials
Featured templates
MonsterONE Subscrioption


Is it possible to launch a website in 12 hours? You start out having lots of time ahead, yet at some point, the deadline creeps closer, and you realize you don’t have enough hours left to do the work.
This is the exact case where the Monstorid2 theme can help you get everything done crazy fast. Unconvinced?
Today we’re doing to show you the process of launching a website as a time-lapse. In 12 hours we’d choose a hosting, install WordPress, edit or create new pages, fill them up with your content, and still have some time left to do the basics of website optimization. After 12 hours your website will be totally ready to accept its first visitors.
Fasten your belt tighter and get ready for our journey in time – it will uncover you the life-saving tricks of how Monstorid2 can save you time, money and, perhaps, your client.
No matter how good the theme is, a poorly chosen hosting can ruin your project. It’s fairly easy to learn the minimum requirements for the hosting server in the documentation for the Monstorid2 theme. Let’s take a look at them:
Also, there are recommended configurations to set in php.ini, like:
Most popular hostings, like BlueHost, offer a simple way to install WordPress using Wizard or other forms of simplified installation.
Moreover, you can contact the hosting support to check if the hosting meets the requirements of the theme you’ve chosen.
In our case, we’d be using BlueHost with Monstorid2 – this hosting is recommended by the official WordPress community and perfectly meets all the requirements.

But you should take your time and look for the hosting that will be right for you.
As for the famous 1-minute WordPress installation, most of the hostings nowadays have Wizard tool or its substitute that allows to create a database and install WordPress CMS automatically.
Also, you should get a domain name in advance, but if you haven’t thought about it, great news – if you’re purchasing a name that wasn’t taken, there’s a 52% chance that you can register it under 24 hours or even faster. Hurry up!
Once we’ve chosen hosting, paid for a domain name, and have the latest version of WordPress installed and ready, we can start with the Monstorid2 installation.
The process begins in the theme archive folder, where you have the M2-Theme-Wizard plugin.
We go to the admin dashboard of the website and open the “Plugins” > “Add New”. Let’s upload M2-Theme-Wizard. After that, we install the plugin and activate it.
In the “Order ID” field we type in the license key. We’re ready to go!
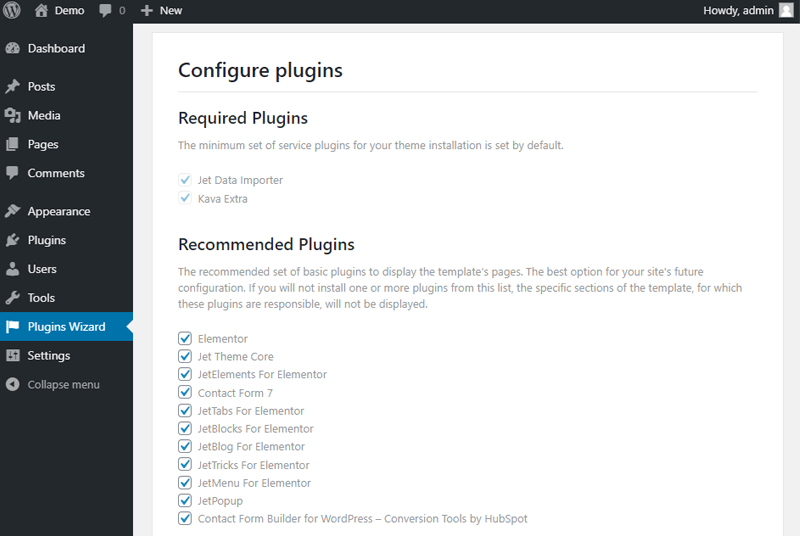
The installation process will take you through such steps as:
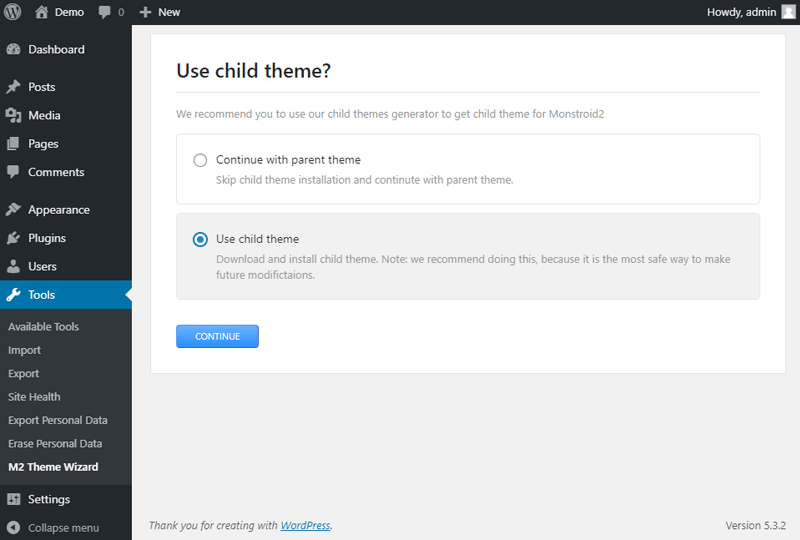
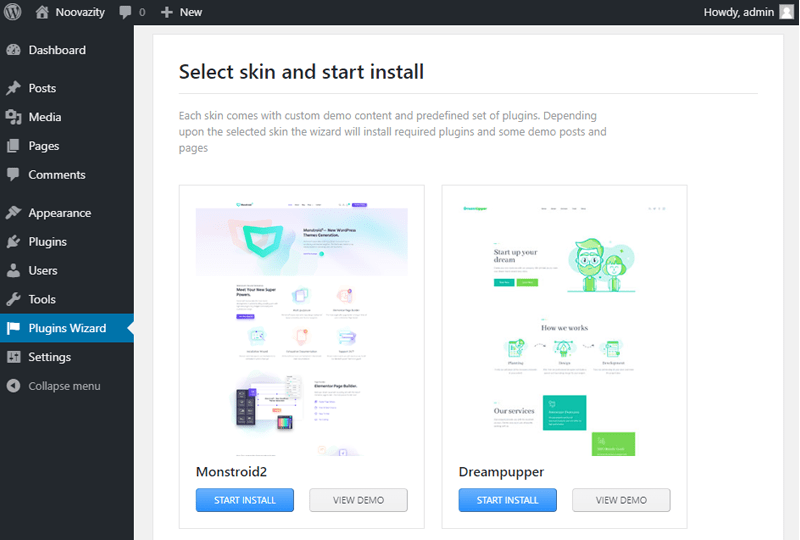
We have chosen Noovazity blog template as a foundation for our blog project. It will let us do the work of launching a project a lot faster.
Also, if you’re undecided on the matter of which template you’d like to use, you will be able to change it in the future fairly easy – so relax and enjoy the process.
The whole thing of the theme’s installation has taken us 20(min) – it also depends a lot on the server you’ve chosen, so the time might be different in your case.
Before starting to build a website, you have to come up with the idea of its structure. The blog website usually has the publications either shown on the front (Home) page or on the Blog page (and the Home page, in its turn, displays static content with the best publications).
The Noovazity template has a static Home page and a separate Blog page that’s not listed in the main menu but exists as the latest posts archive.
If you want to show the posts archive on the front page, go to your website’s Dashboard, open “Settings > Reading” and here specify “Front page displays > Your latest posts”.
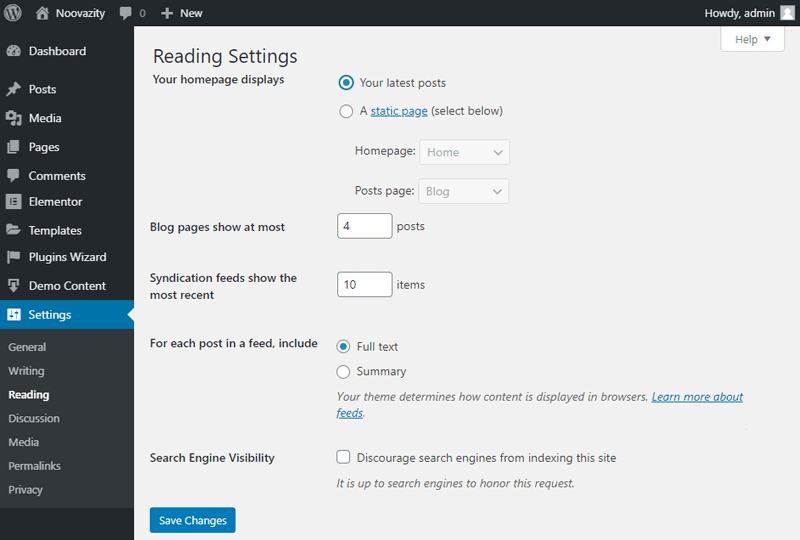
In our case, we’d have a separate Home page for our blog project, so we’ll stick to the structure of the template we use as a basis.
We’ll be creating a blog project for a healthy lifestyle topic, so we’d also want to separate our content into categories.
Roughly, the structure of our website will entitle:
There also can be About and Contacts pages, but these are the static pages that are fairly easy to add and edit in Elementor, so we won’t stop on them for long. If you need to add them, add them via the dashboard and then use Magic Button pages templates library to choose the pages you’d be adding.
Now let’s talk of the general page’s structure. Each of the pages consists of header, footer, and the main body. Naturally, our next step will be to add header and footer templates to use for the pages on our website.
To create a custom header in the Monstroid2 theme, you don’t need to code. Simply come back to the old good admin dashboard and find the Monstroid2 tab, which will lead you to the “My Library” area.
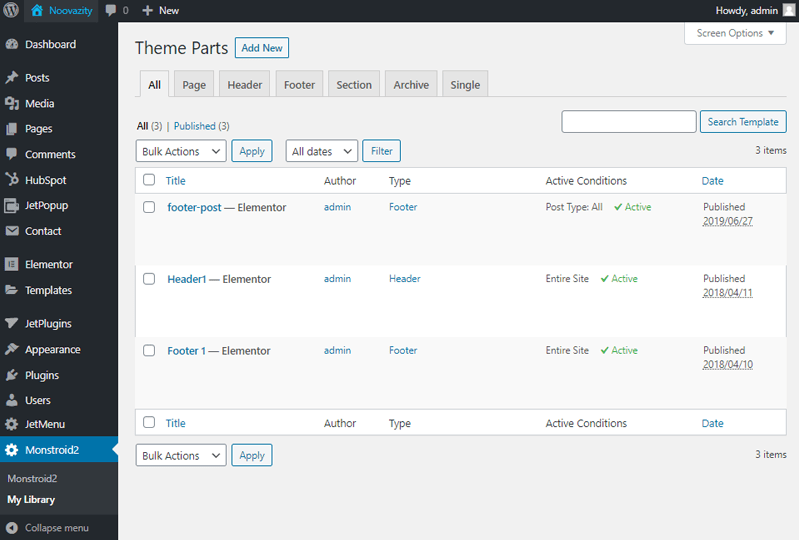
Take a look at the theme parts, which are presented by the various templates. If you are using a Monstroid2 skin, you will find at least one pre-made header template. However, if the table is empty, don’t worry. Let’s create a new header from point zero.
Click on the “Add New” button and select the header type. Name your template and save the changes.
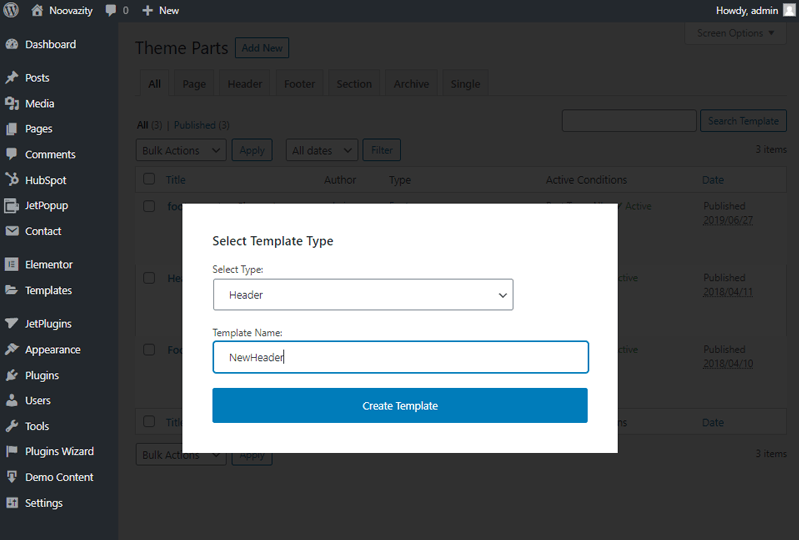
Now you can see that you are redirected to the Elementor editor area, where you can build the header using tons of widgets with abundant options, according to the content and style of your header block.

There are widgets for adding a logo, adding a search field, breadcrumbs. And, surely, you can’t imagine a header without a menu.
The last step is to assign a header to your website’s pages. You can use one header for all website, or create different header variations for different page templates – that depends on your web pages’ design.
To set the conditions for the header template you’d need to click on the cogwheel icon in the bottom left corner and open the “Conditions” tab. In the “General” dropdown set “Entire site”.
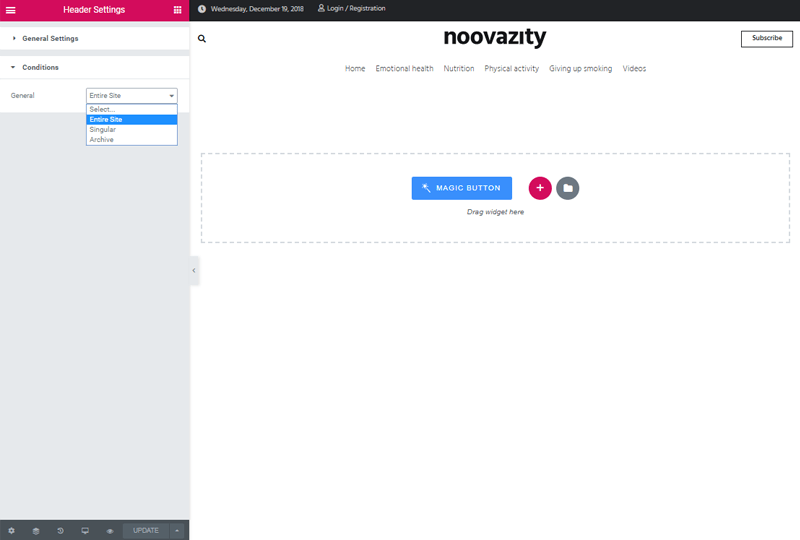
Also, you can create a footer template and set it to the pages you need in the same manner.
Creating a header and a footer with all the stylization has taken us about 1 hour. Once it’s done, we can work on a menu.
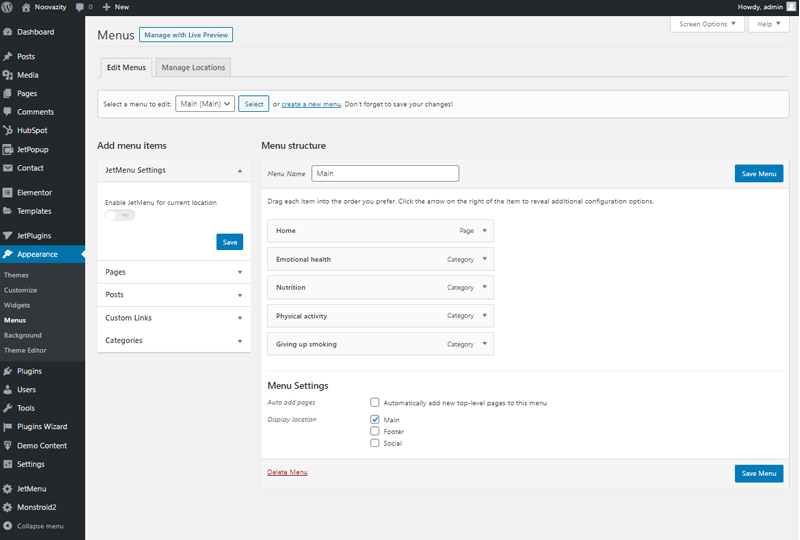
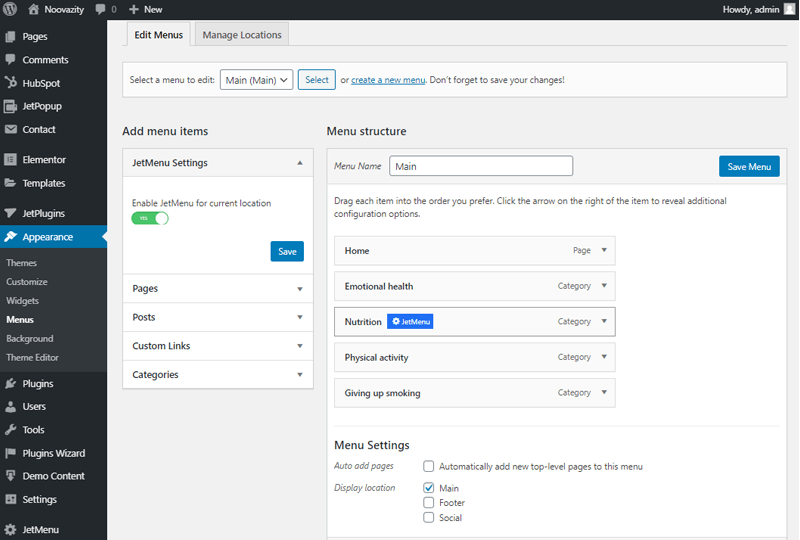
The process starts in the admin dashboard, as usual. Find the “Appearance” tab and move on to the “Menus” subtab. As we are working on a blog website, our menu will contain the Home page and archives of various categories.
As we’d have to replace the content imported when we were installing a template with the real one, we will also have to work on the categories list.
To preserve the same structure and keep the demo content in place, but see the actual new categories, we’ll rename the existing ones that were imported with the Noovazity template.
This can be done in the “Posts > Categories” tab from the dashboard. Also, don’t you forget to change the slug (the link name).
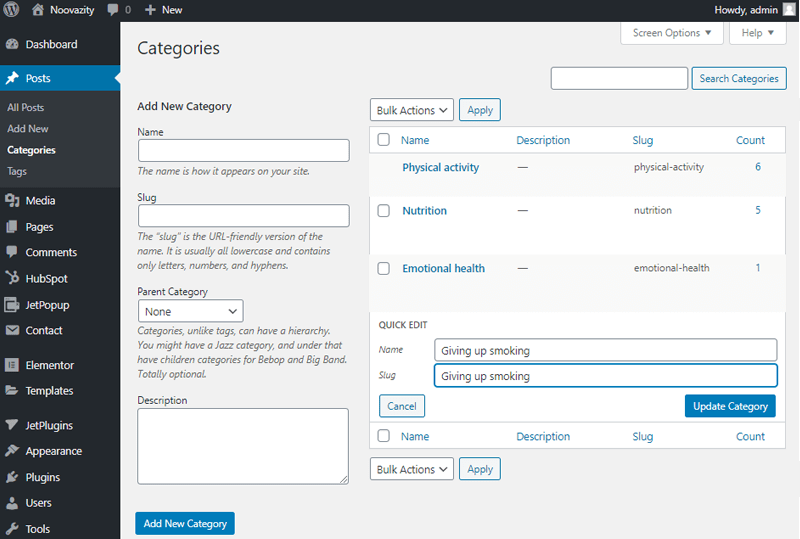
If you want to create new categories, just give a name to the new category, write down slug, set parent category if necessary, and add a description.
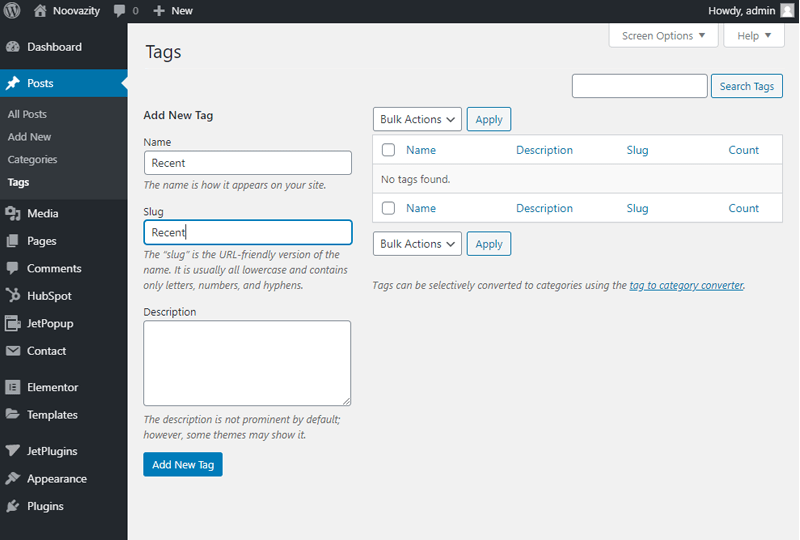
While categories are a hierarchical taxonomy structure, the tags represent the non-hierarchical taxonomy that can be used to display related posts.
Coming back to tags, here everything works even simpler. Provide a name to the custom tag, write down a slug, and add a decent description.
Visit the “All Posts” tab and take a look at the table, which showcases all your posts. Here you can also find the category and tag of each post. You can replace the tags and categories you’ve got from demo content with the new ones for the posts you’ve added.
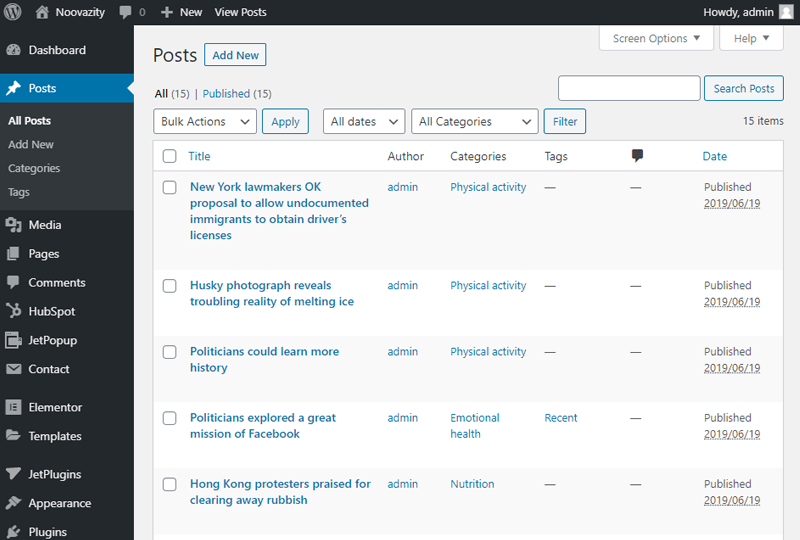
To quickly assign posts to certain categories or tags click on the “Quick edit” option (available when you hover on the post title in the listing). This will open a “Quick Edit” workspace, where you can set a tag and category for your post in a pair of clicks.

The replacement of the demo content with the one we’d have for our project has taken about 1,5 hours. It might be even faster if you’re working on an existing site that has your content and you’ve appended the demo content to an existing one.

Can’t wait to see the result? We too!
Creating a menu for easier navigation will take no more than 1 hour. It’s a really fast step.
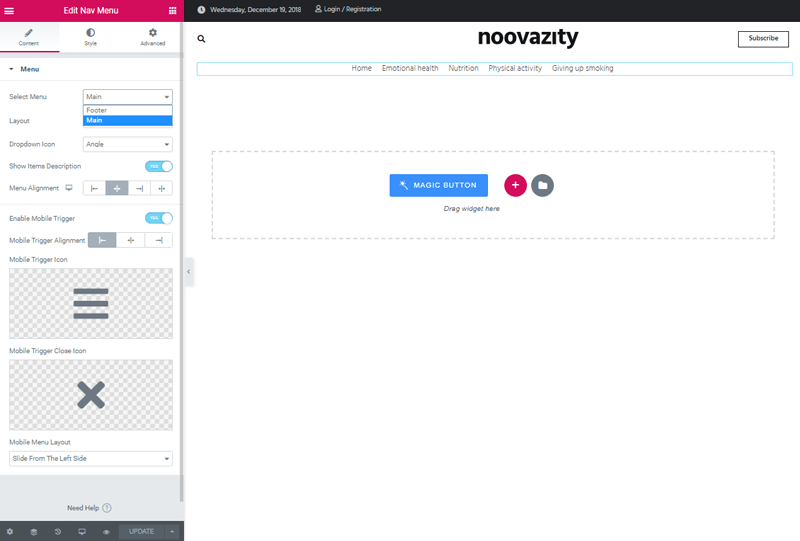
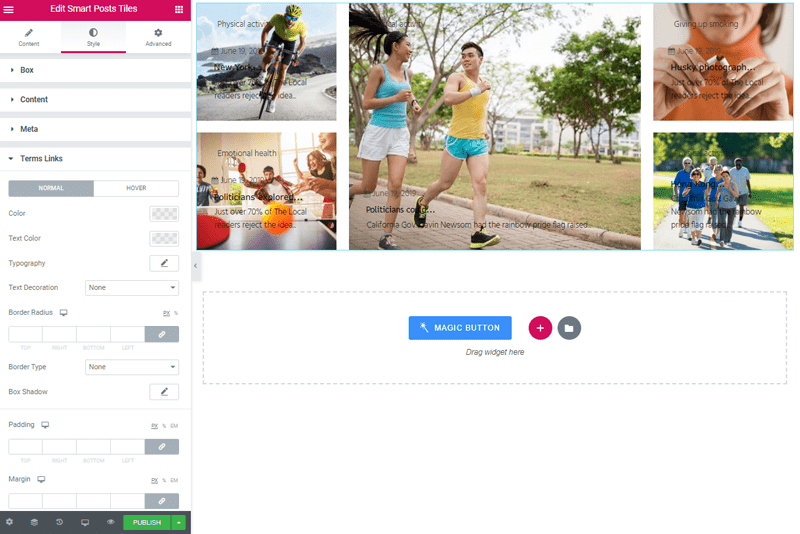
Let’s go further and upgrade your classic menu to the mega menu! Simply move to the “Menus” setting in the admin dashboard, pick the menu you are working with and enable “JetMenu for current location”. Save the changes and click on the “JetMenu” text, which will appear after you hover one of your menu items. We’re following a few simple steps to customize the item:
To enjoy the final result of your work, go to your website and take a look at the mega menu, which in our case now showcases Smart posts list block.
Now it’s time to revamp the main page of our website! We go to the frontend, and in the top bar click “Edit with Elementor” (make sure not to click the header template that’s also shown in the dropdown). Voila! We’re in the editing mode.
In the sample Home page available in Noovazity template you have such elements as:
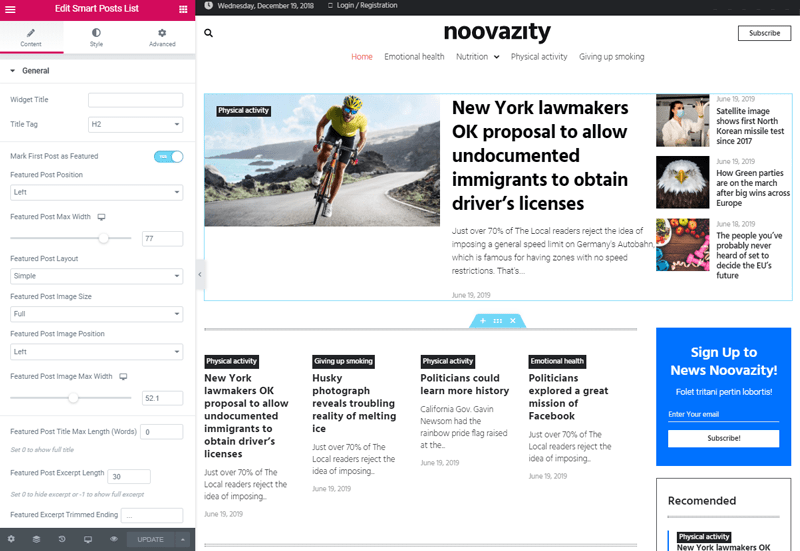
However, when you work with the Home page, sometimes you don’t know how the new post will look in the listing when it’s added, so it’s safer to keep this element static, picking the most engaging publications to show on top.
Just make sure to replace the IDs there with the ones for publications you’d like to showcase.
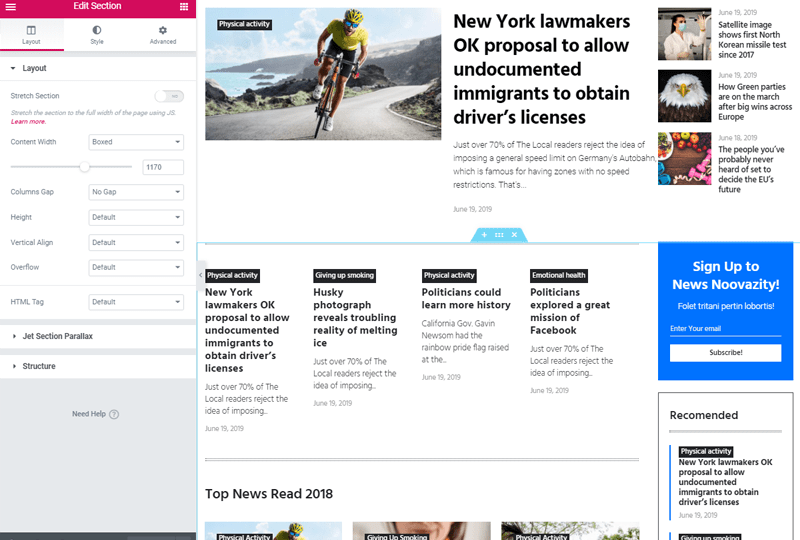
The left inner section has 77% percent width and contains a separator element to add a space, and the “Smart Posts List” element that displays publications in 4 columns without marking any of them as a featured one.
The query settings are set by default in order to showcase the latest posts – although they are shown without featured images.
You might want to keep these posts feed the way it is, to show your latest publications, or set query posts by categories or tags to showcase the ones you want.
Right below this element, you’ll see another spacer element and a “Heading” widget that provides a title for the next posts feed.
As we’re replacing the posts with our own feed, we’ll be changing the title as well.
To query posts by author, you can use the following code:
{“post_type”:”post”,”author”:”author-id”}Here author-id stands for the ID of the specific author.
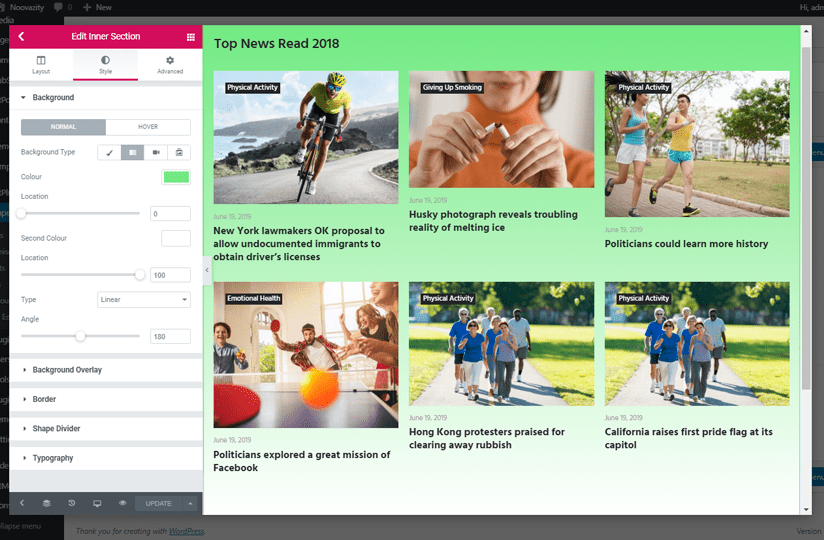
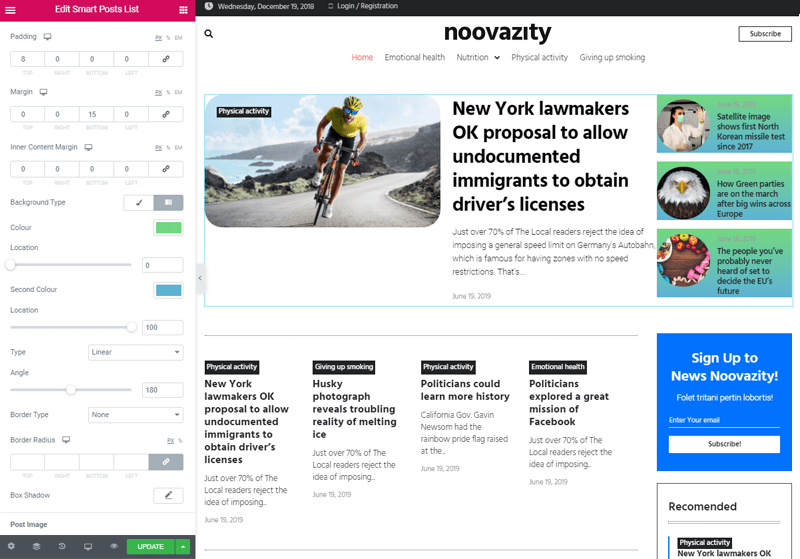
Also, to use the same color scheme for all of the widgets on the page you can simply modify the stylization of one widget (say, on top of the page) and then just copy the style settings used for the widget (this is a very handy option available in Elementor you can use for headings as well).
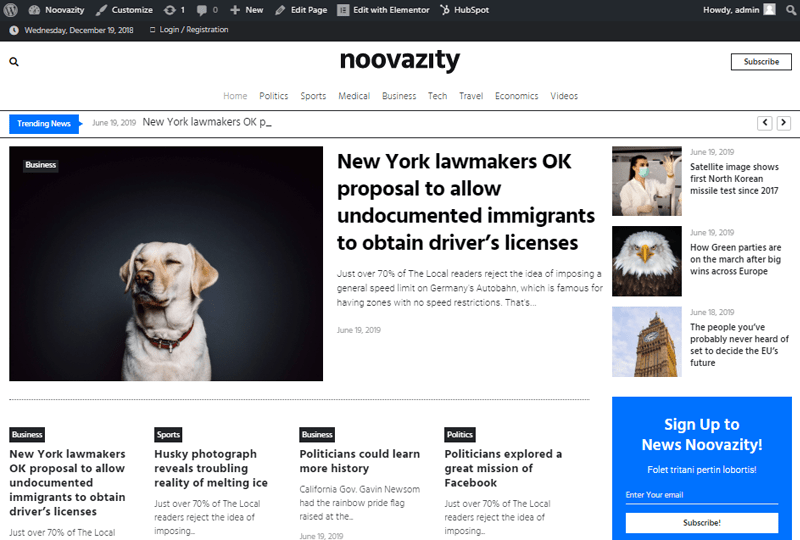
In my case, we’d be creating a blog dedicated to healthy lifestyle, so that’s natural that we’ be changing the color scheme just a bit.
On the example below, you’d see how you can easily make the Home page from the Noovazity template look way different in 30 Minutes (we have only slightly changed the color scheme and used the actual content instead of the demo content offered in the template).
Now, speaking of the inner section on the right, the Home page template has it set as a Sticky element (the option can be enabled or disabled in the “Column > Advanced settings”). To manage the settings of this effect (such as Top and Bottom spacing, disable it for the specific device, etc.), you’d have to open JetTricks and change the values in the corresponding fields.
The Home page also contains a video playlist that you can use to showcase your videos if you’ve got a Youtube channel. It can be styled as you wish, you’ll also be able to pick a particular layout (vertical or horizontal).
Today we’re not going to add videos to the Home page as we don’t have a video feed for this project, so we skip this step and just remove the section.
After the video playlist, there is a spacer and another post feed along with the column on the right where you’ll find the widgets for social icons.
Here you’d need to replace the links with the actual links to your social media profiles.
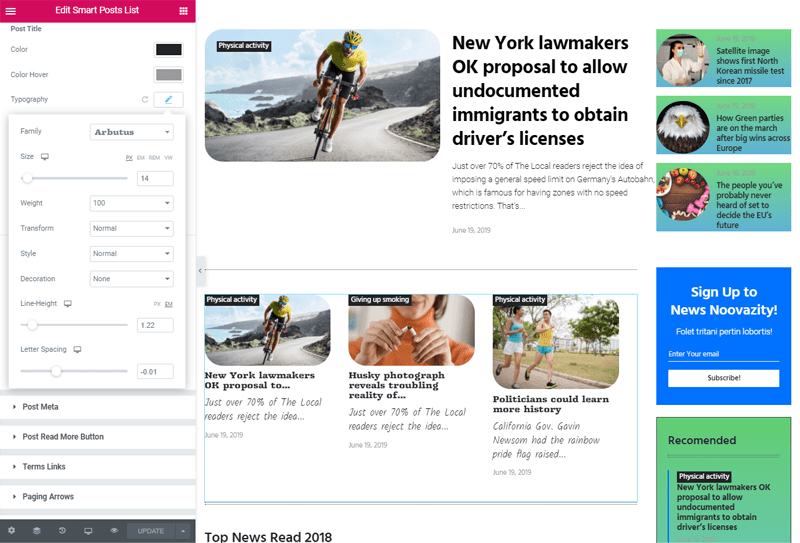
Right below it, you’d find the Tabs widget that contains two different templates (for Recent and Popular posts). You can edit each of them according to your needs to make sure you display the posts you want to showcase there. Also, feel free to change the stylization of the widget and rename the tabs if necessary. Here’s the result we’ve gotten:

The page ends with a pattern of the Smart posts list widgets that repeat the layouts used above but query posts differently.
We have decided to keep only the layouts we needed for displaying the main categories of the blog, so some of the widgets were removed.
Here’s what we’ve gotten as a result:
Now that the editing of the Home page is finished, we need to click the Update button to save the changes. Also, you can always save the page as a draft or as a template if you want to use it or some of its sections elsewhere throughout the site.
We’d be saving one of the Smart Post List layouts to use it then when creating the Blog page template.
All in all, the whole process of editing the page to adjust it to the needed stylization and content took us about 2,5 hours, but you’d be able to do it quicker if you’d have all the content already in place.
Think that’s all? No way! Make your blog Home page even more entertaining with a top-notch revolution Slider plugin! In case you don’t have such a tool in your M2 skin, you can simply go to the Monstroid2 tab and choose the Plugins area. Find Revolution Slider, install and activate it. After that, you will be able to find the Slider revolution tab on the admin dashboard.
And so you’re free to create sliders and add them to any of your pages. Our project doesn’t require this functionality, but you still can enrich your website with a slider if you want.
The Blog page template, sometimes also called Latest posts, or Archive page – is a page that displays your publication in chronologically descending order (from the latest posts to the oldest).
You can do it using 3 different widgets that all support dynamic content: Smart Posts List, Smart Post Tiles, or Posts.
Feel free to add a pre-styled template for the posts if you have one saved from the Home page.
After that, it’s time to add navigation or pagination element (depending on what you need) to the page’s template.
You can do it using Posts Navigation or Posts Pagination widget. Just drop it to the page’s canvas, and style it up. Also, pay attention that if the page is not assigned as the posts archive yet, the pagination might not work. So if you don’t see the element after adding it, check in the template settings (bottom left corner of the editor) in the Conditions block if the template is set as Archive (“General >Archive > Post type archives > Posts”).
After that, we click the Publish button and return to the Dashboard. Here we navigate to Settings. Reading and set the number of posts you want to display per one blog page.
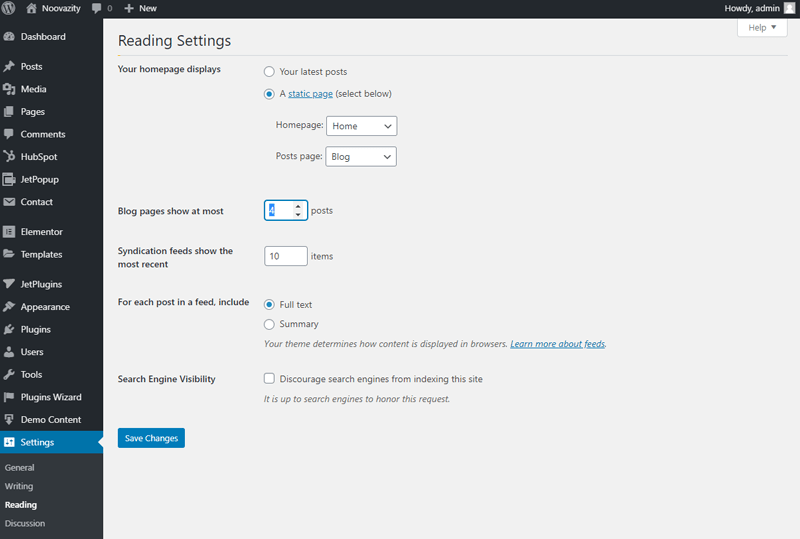
As a result, the pagination (or navigation) will be separating posts into pages by the number of posts you’ve chosen.
Also, you can create separate archive templates to use for specific categories or tags, for Search, etc., by making adjustments in the Conditions block of each of the templates you’ve created.
If you don’t want to spend much time on building a blog template with Elementor, try the pre-designed blog layouts available in Monstroid2 theme out of the box.
To try them on you’d have to refuse from using a template built with Elementor and go to “Appearance > Customize” instead.
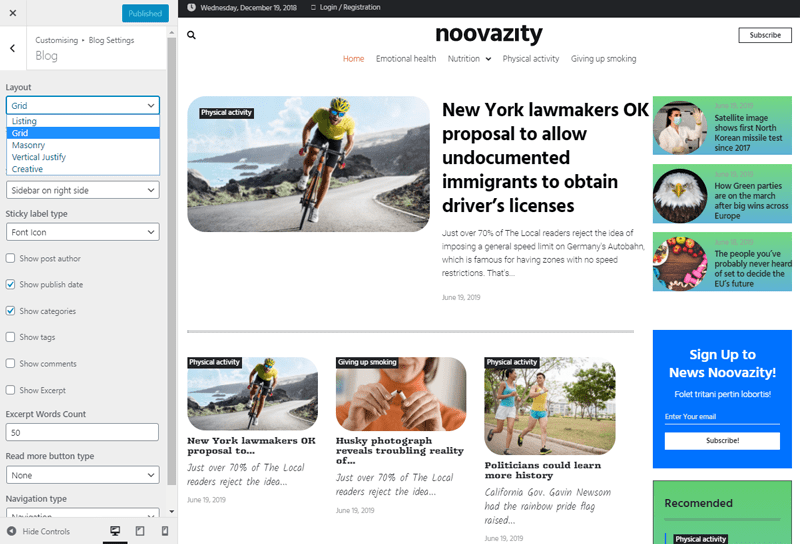
Here navigate to Blog and play around with Listing, Grid, Masonry, Creative and Justified layouts. Each of them has its unique styles which by the way look classy but lack in advanced customization settings (which is available when you create a template in Elementor and then apply it to wherever you need).
Once you’ve created or defined a Blog post template, you’d need to set a Single post template to apply to all of your publications.
You’ll be able to adjust the sidebar (e.g., show tags, author, categories) and make the related posts be displayed the way you want.
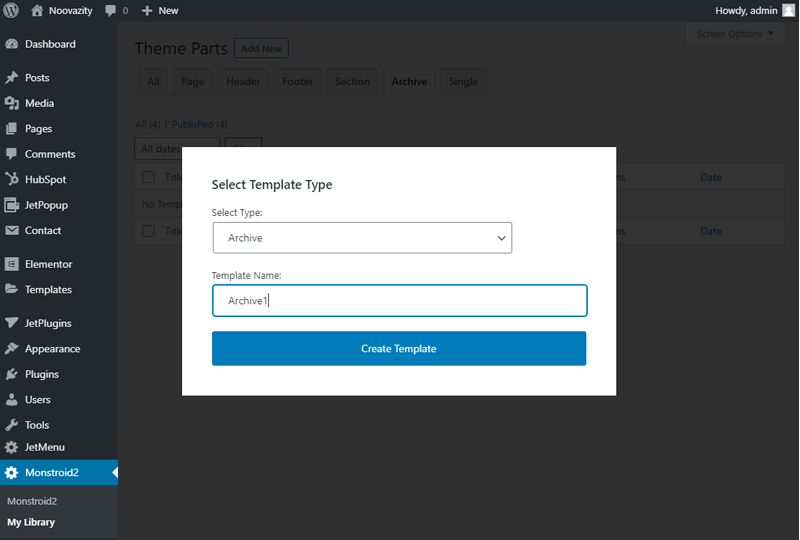
To create a template that defines how each of your publications look, you’d have to go back to “Monstroid2 > My library”, and create a new template with the “Single” type.
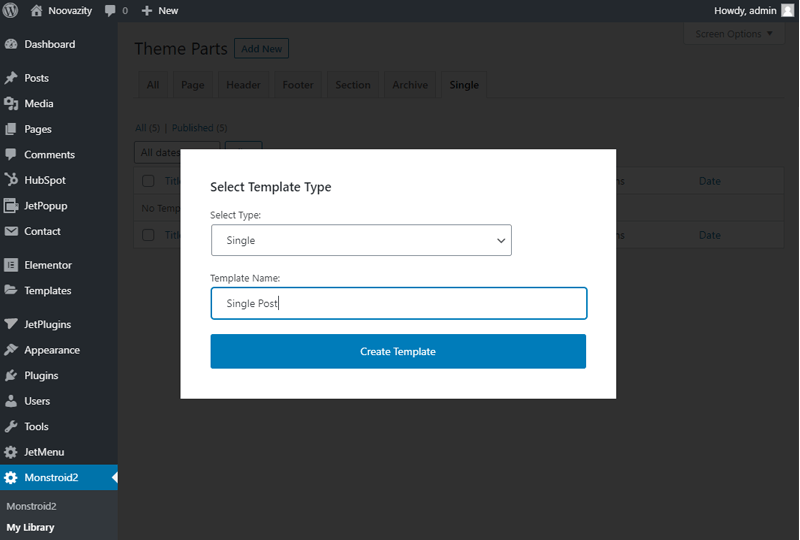
However, to add dynamic content, such as post title, etc., to make it pulled from the post, you’d have to use external dynamic functionality that’s not available by default (however the template functionality will let you do it if you have a tool to add dynamic fields).
If your website was in the maintenance mode, or you have disabled indexing, after everything is finally ready, and all the content is in place, you will need to optimize the website.

Now your website is visible for Google bot and other search engines. And you can start adding new content to evolve your blog portal.
Use “Disallow” to discourage the search engines from crawling the pages you don’t want to be indexed.
The sitemap can be either static or dynamic. However, to grow your website’s traffic and content we recommend you to use dynamic sitemap that can be automatically generated by third-party SEO plugins, such as Yoast.
This can be done either with uploading HTML file, adding HTML tag in your website’s
and , or use Google tag manager container to add analytics and search console as tags if you’re an admin).The data will start to collect right after you’ve successfully verified your website and domain. But in Google Search Console you’d have to also specify the sitemap.
Also, we have to connect Google analytics to Search console to work with top landing pages, queries, and devices stats, which is extremely useful.
And now we’re heading towards the finish line! Various options for subscribing to blog updates are an effective way to gain the target audience to a resource and increase conversion if you’re planning to sell anything from your blog in the future.
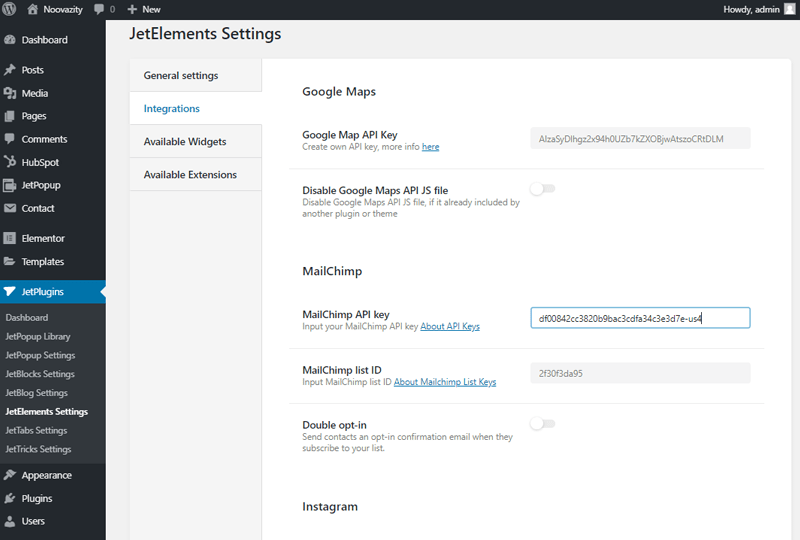
You can easily add a Subscribe form to any of the pages built with Elementor. There’s a Subscribe widget available for you at all times in the editor.
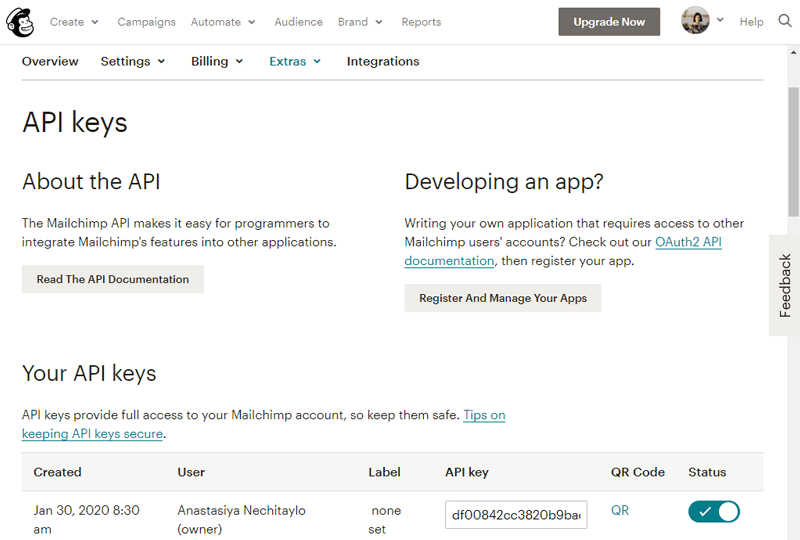
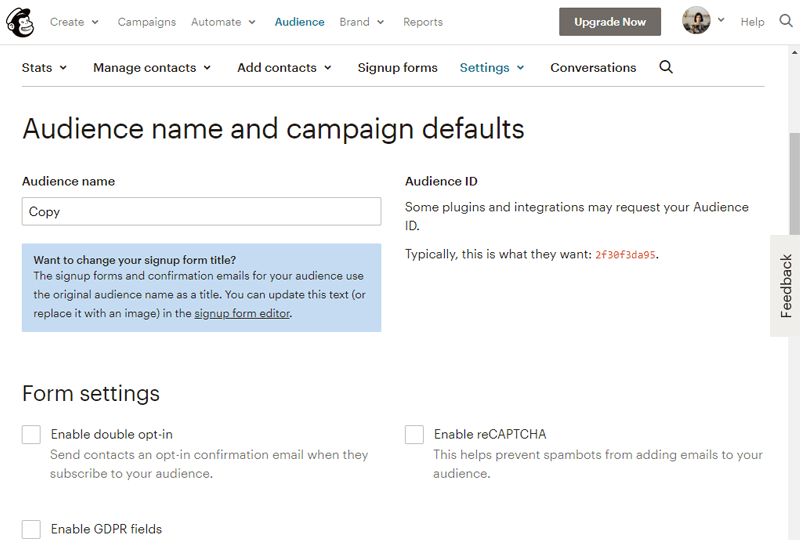
However, to connect the form to Mailchimp you’d have to know your Mailchimp API and Audience ID. If you don’t know where to find this information, and where to place it, follow the next steps.
As you can see, having a multipurpose theme like Monstroid2 at hand when the deadlines are closing up on you is a huge benefit that allows you to outmaneuver the time and do the work.
Hoping our time lapse journey was helpful, and you’ll always finish your projects ahead of time.
