- Web templates
- E-commerce Templates
- CMS & Blog Templates
- Facebook Templates
- Website Builders
CherryFramework 4. How to manage footer logo
July 30, 2015
This tutorial will show you how to manage footer logo in CherryFramework 4.
CherryFramework 4. How to manage footer logo
-
Log into WordPress dashboard.
-
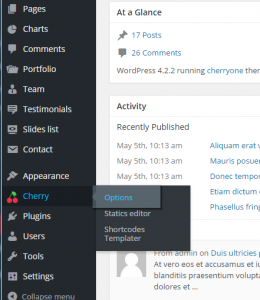
Navigate to Cherry > Options:
-
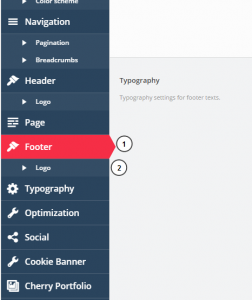
Choose Footer > Logo tab:
-
You can use Image or Text logo. Text logo is the same as Site Title:
-
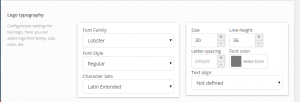
You can change font family, font size, font color, line height, letter-spacing, etc. under Logo typography, if you are using a text logo:
-
If you want to upload your footer logo image, you should choose Image logo under Logo type.
-
Then click "Choose media" and upload your logo or select it from Media library:
-
Click “Save options” button to save changes.
-
Refresh your page, logo is changed now.
Feel free to check the detailed video tutorial below:


