


- Web templates
- E-commerce Templates
- CMS & Blog Templates
- Facebook Templates
- Website Builders
FAQs
General Tutorials
Featured templates
MonsterONE Subscrioption


This tutorial shows how to change banner images in CherryFramework 4 themes.
.jpg)
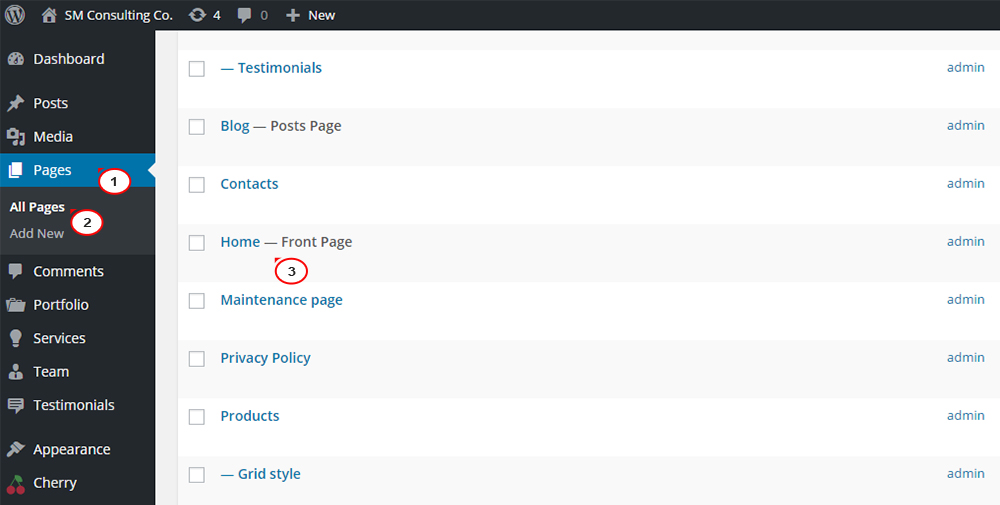
In order to change banner images on your page, open your page for editing in Pages->All Pages section in your site admin panel.
Then, press the Insert shortcode button.

Select Banner shortcode among the list.

After this, press Media manager button to choose the image from the Media library.

Copy the code of your banner image and press the Close button.

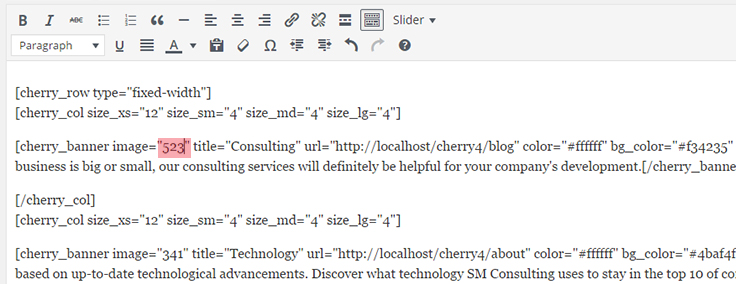
Locate your banner shortcode in the editor and change image property to the one you have copied.
Press an Update button to save changes and refresh your website.
That is the end of the tutorial. Now you know how to change banner images in CherryFramework 4 templates.
Feel free to check the detailed video tutorial below:
CherryFramework 4.x. How to change banner images.
You may also look through our premium WordPress Themes if you need more themes with Cherry Framework functionality.
