


- Web templates
- E-commerce Templates
- CMS & Blog Templates
- Facebook Templates
- Website Builders
FAQs
General Tutorials
Featured templates
MonsterONE Subscrioption


This tutorial will show you how to change slider dimensions in Shopify template.
Shopify. How to change slider dimensions
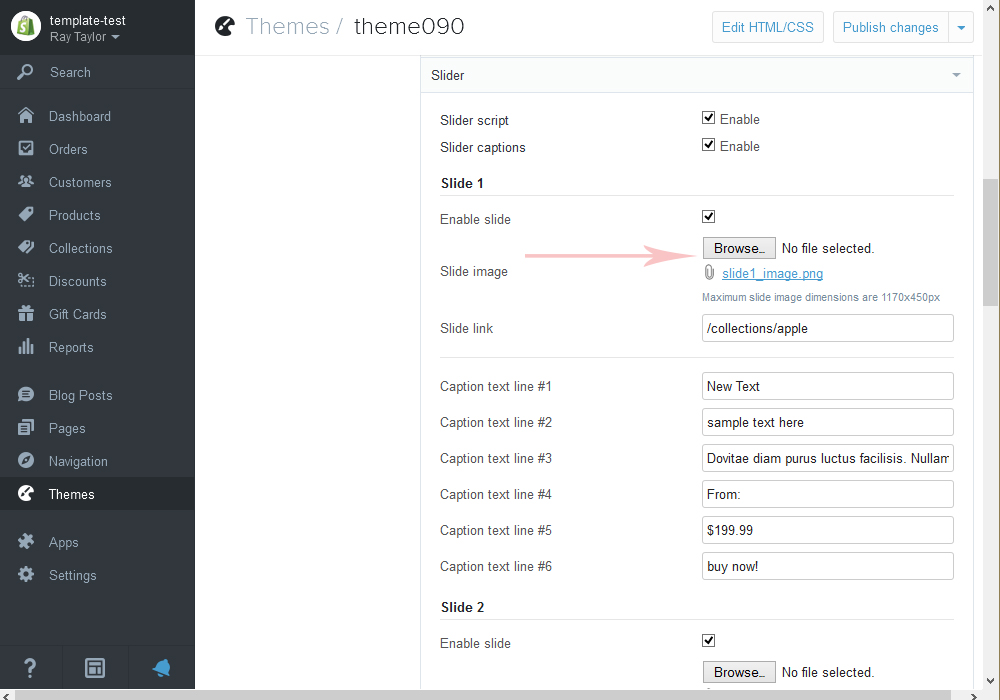
Log into your admin panel and navigate to Themes option.
Click on Customize Theme button.
Our new images were created with 570px width and 322px height. Original images have 1170 x 450px.
We are not going to use the third slider image in this example, however, please note that you need to have all your images with the same size.
Save the settings by clicking on Publish changes button:
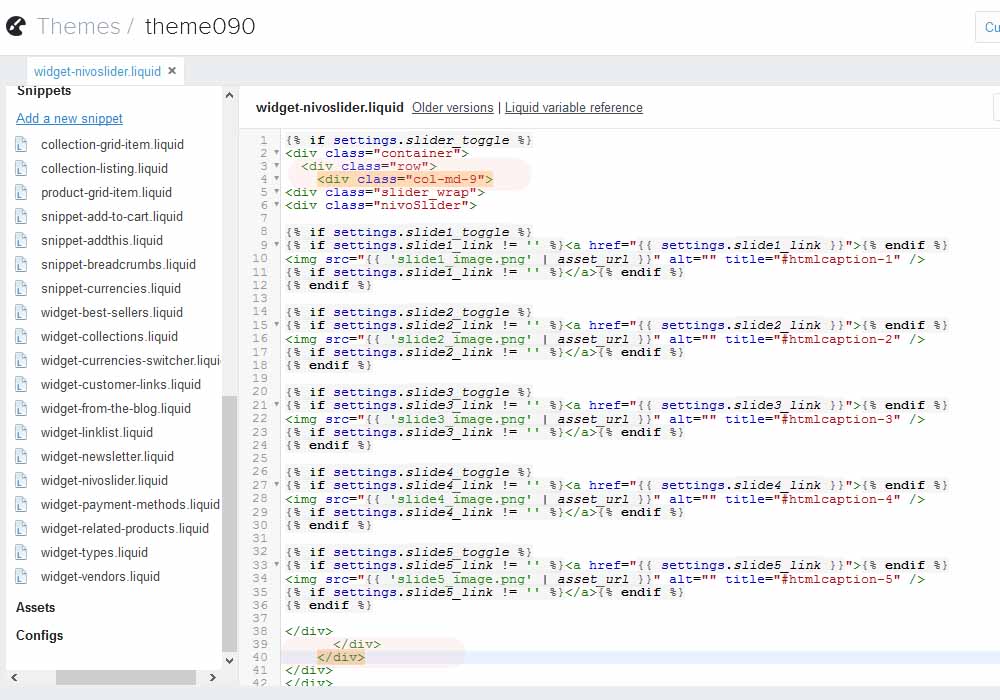
Go to Themes -> Edit HTML/CSS option.
Click to select widget-nivoslider.liquid file under Snippets:

Insert the following div under:
<div class="container">
	<div class="row">
Depending on the desired slider size, we will insert the following div into the
<div class="row">
	<div class="col-md-9">
To make it bigger or smaller, increase or decrease the col-md- value, for example:
<div class="col-md-6"> or <div class="col-md-12">
Don’t forget to close your newly added divs by adding closing div tags at the end:
	</div>
</div>
Click on Save button to save your changes. Reload your page to see the changes.
This is it. Now you know how to change slider dimensions in Shopify. Good luck!
Feel free to check the detailed video tutorial below:
