


- Web templates
- E-commerce Templates
- CMS & Blog Templates
- Facebook Templates
- Website Builders
FAQs
General Tutorials
Featured templates
MonsterONE Subscrioption


This tutorial shows how to manage suppliers in PrestaShop 1.6.x.
PrestaShop 1.6.x. How to manage suppliers
In PrestaShop, a supplier is the company which provides you with a product.
Having suppliers registered is optional if you already have manufacturer who directly supply you with their products. It all depends on your needs, but if your product supplier is not the same as the product manufacturer, then you should make sure to have both registered in your system, and associated with each product.
Managing suppliers
Log into the backend of your PrestaShop and go to Catalog -> Suppliers and click on the button Add new supplier:

On the page that opens fill in the fields, the required fields are marked with a red asterisk (*):
Name Indicate the name of the supplier in order to simplify your visitor’s search.
Description Add a more complex description of your supplier and their activity and products.
You can inform about their specialties and promote the quality of their products. The supplier’s description will be shown within your shop.
The address fields Phone, Address, Postcode, City, State, and Country. The “State” field only appears for relevant countries.
Logo Having a supplier logo is essential: it leads the customers’ eyes to trust your shop almost as much as they trust that supplier/brand.
Meta title The title that will appear on the search engines when a request is made by a customer.
Meta description A presentation of your site in just a few lines, intended to capture a customer’s interest. This will appear in search results.
Meta Keywords Keywords that you must define in order to have your site referenced by search engines. You can enter several of them, separated by commas, as well as expressions which must be indicated in quotation marks.
Enable You can disable a supplier, even temporarily. This will only remove it from the suppliers list on your shop’s front-end.
Click Save when done:


When the changes are saved, you can View, Edit or Delete the supplier(s) by clicking on the corresponding buttons:

In order to associate products with suppliers, navigate to Catalog -> Products and select the product you need. On the Suppliers tab on the left you will see a table with all the enabled suppliers. Just mark the checkbox for the respective supplier.
You can have more than one supplier for a product. If you mark more than one supplier, you can select the default one using the Default radio button.
Click Save or Save and stay when ready:

Additionally, you can specify the price per unit that you paid to the supplier for the product, the currency that you used, and there’s also a field for supplier reference in the Product Reference(s) section on the same page.
Click Save or Save and stay when the changes are made:

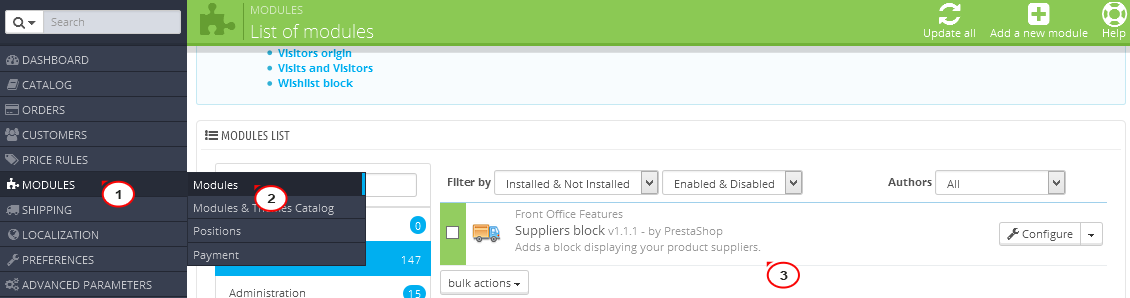
The suppliers are displayed on the site with the help of the Supplier module that can be found in Modules -> Modules:
You can learn more about managing Suppliers in PrestaShop in official documentation.
Feel free to check the detailed video tutorial below:
