


- Web templates
- E-commerce Templates
- CMS & Blog Templates
- Facebook Templates
- Website Builders
FAQs
General Tutorials
Featured templates
MonsterONE Subscrioption


This tutorial shows how to apply snapshot to Drupal with custom database prefix.
Drupal 7.x. How to apply snapshot to installed Drupal engine with custom database prefix

Please open sites/default/settings.php file in editor. There you will see what database table prefix is being used in your Drupal installation.

By default, Drupal does not assign prefix to database tables. That’s why demo profile is designed to be used for installations that do not have database prefixes.
Most hosting autoinstallers add prefixes like drup_ during Drupal installation. That is why issues with demo profiles occur. There are two methods you can use in order to resolve the issue:
Reinstall Drupal using demo profile. In this case no prefix will be assigned to database prefix.
You can modify .sql file specifically for custom database prefix and import it to database.
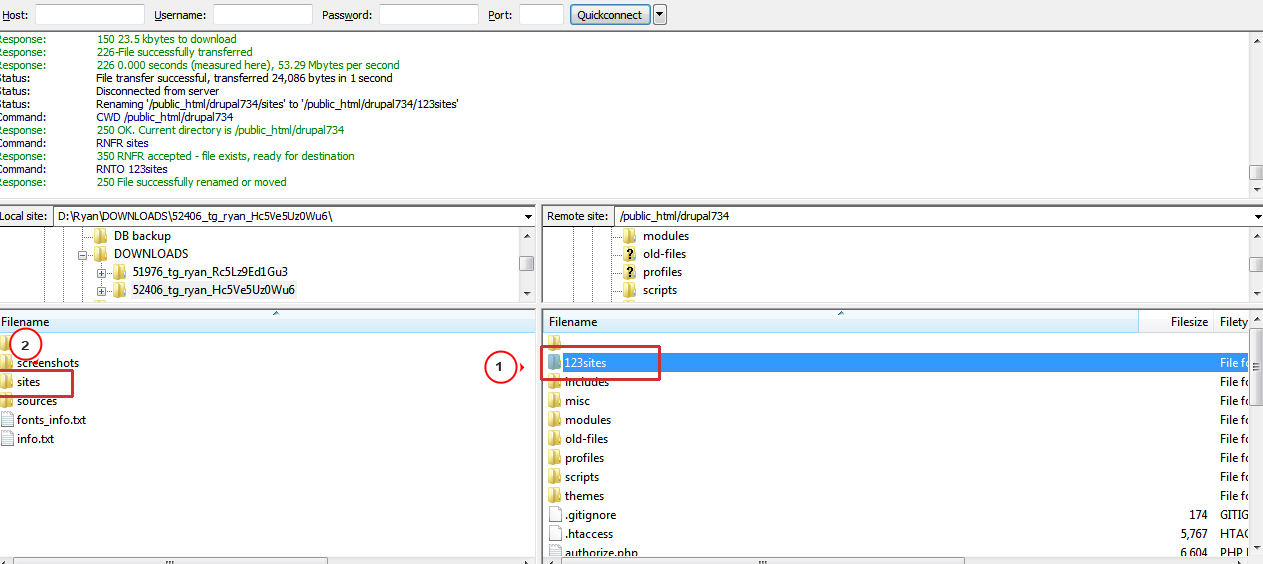
Rename sites folder (located in your Drupal installation directory) to sites123 (for example).
Upload sites folder from your template package to your server:
Upload sources/demo_profile to profiles folder of your Drupal.
Upload sources/install.inc file to includes folder and accept file replacement.
Upload system.install file to modules/system folder and accept file replacement.
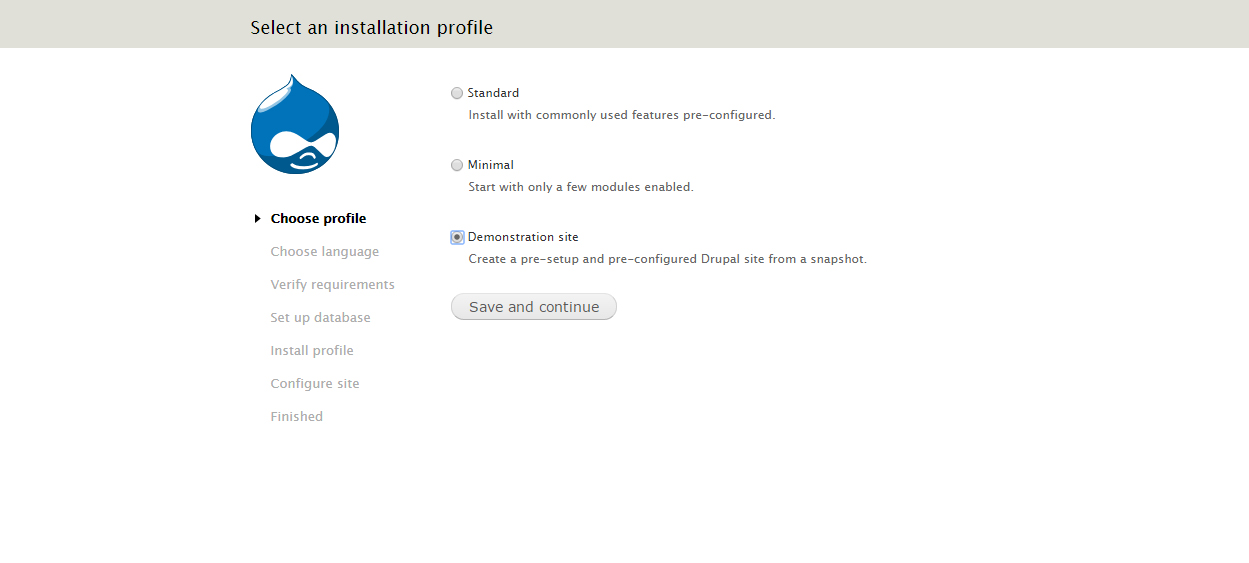
Refresh your web site. You should get Drupal installation dialog. Select Demonstration site:
Install Drupal to the clean database (you should remove database tables from previous installation).
Select themeXXX snapshot. Click Restore:

We can see that demo profile is applied:

Refresh your site. We have applied demo profile:

Make sure that you have uploaded all template files according to template documentation.
Upload sources/demo_profile to profiles folder of your Drupal.
Be sure to back up current database. Open database management tool like PhPmyAdmin, open drupal database, select all tables and drop them:
Open \sites\default\private\files\demo\themeXXX.sql file in editor. We should add database prefix to sql query. Open search and replace window of your editor. We are using Notepad++ software. You should press Ctrl+H in order to open search and replace dialog.
Open Replace tab.
Change all instances of CREATE TABLE IF NOT EXISTS ` to CREATE TABLE IF NOT EXISTS `drup_
IMPORTANT: You should specify your database prefix instead of drup_

We should perform the same actions to INSERT INTO ` query:

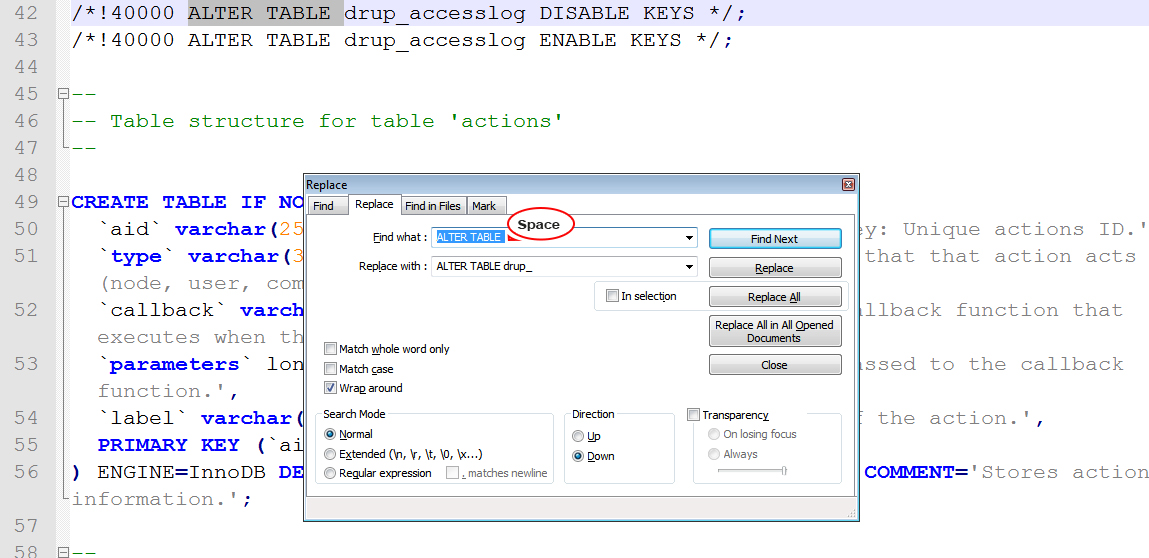
Perform the same actions to Alter table query. Make sure that you have left space. Please check the screenshot for detailed information:
Save changes you have performed to .sql file. Open Drupal database. Drop all tables in database and import sql file with sample data:

Refresh your site. Template looks like the live demo with sample content:

Feel free to check the detailed video tutorial below:
Drupal 7.x. How to apply snapshot to installed Drupal engine with custom database prefix
