Categories

Featured templates

Featured templates

Featured templates

Featured templates

Featured templates

Featured templates

Featured templates

Featured templates

Featured templates

Featured templates

Featured templates

Featured templates

Featured templates

Featured templates

WordPress Blogging themes. How to add logo to stick-up menu

Rating: 5.0/5. From 2 votes.
Please wait...

The following tutorial is going to show you how to add logo to the stick-up menu in WordPress Blogging themes (Monstroid2).

  1. Open the /wp-content/themes/monstroid2/assets/js/ folder on your server.

  2. Download the theme-scripts.js file to your computer and open it for editing.

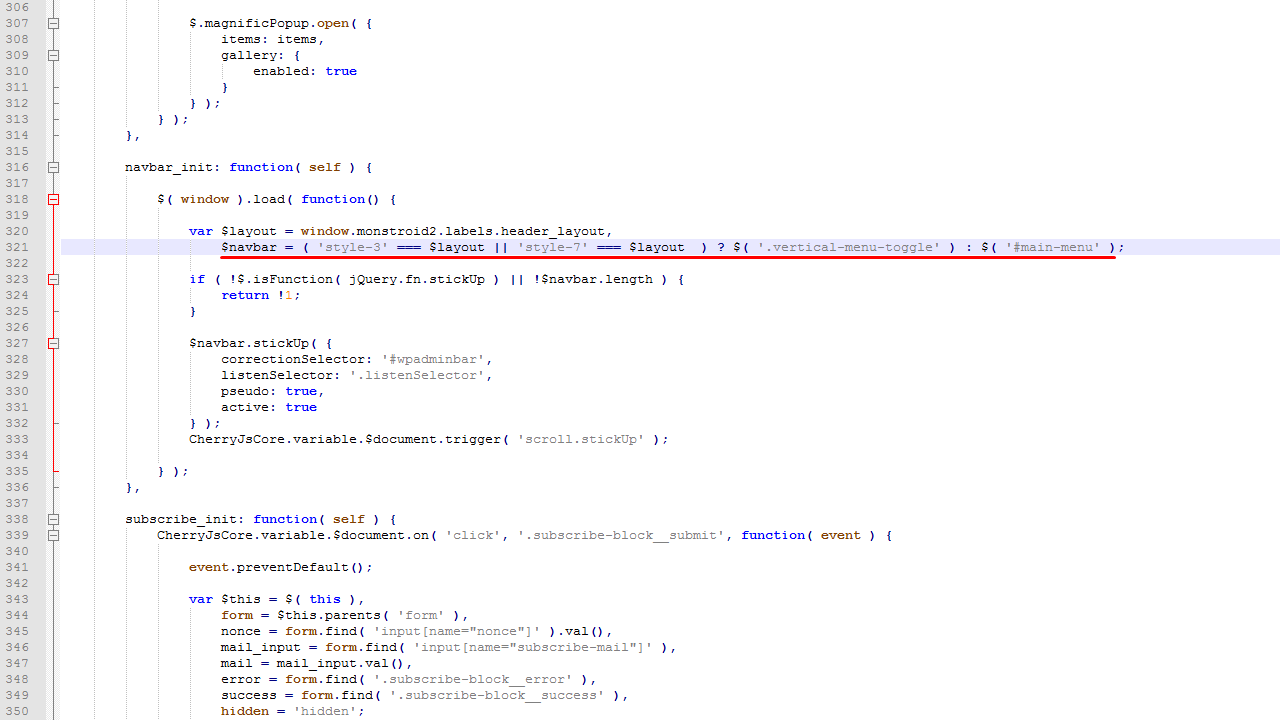
  3. Find this line of code (lines 320-330 approximately) :

    $navbar = ( 'style-3' === $layout || 'style-7' === $layout  ) ? $( '.vertical-menu-toggle' ) : $( '#main-menu' );
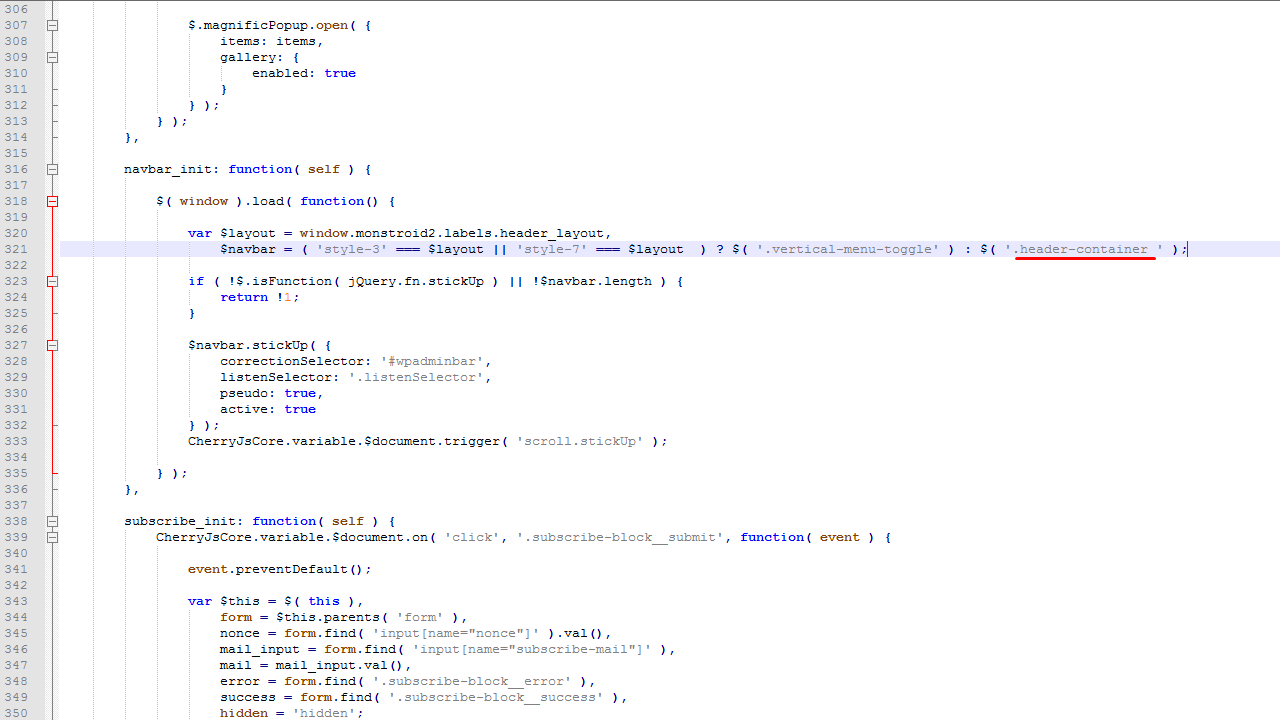
  4. Replace the #main-menu menu ID with logo and menu section’s class:

  5. Save the changes and upload a theme-scripts.js file back to /wp-content/themes/monstroid2/assets/js/ folder on your server. Accept the replacement.

  6. Then add this CSS rule to the Appearance->Customize->Additional CSS field and save the changes:

    .header-container {
        width: 100% !important;
    }
  7. Clear your browser cache and check a stick-up menu appearance.

This is the end of the tutorial. Now you know how to add logo to the stick-up menu in Monstroid2.

Feel free to check the detailed video tutorial below:

WordPress Blogging themes. How to add logo to stick-up menu
Best Premium Wordpress Themes
This entry was posted in Monstroid Tutorials, WordPress Tutorials and tagged logo, menu, Monstroid2, stickUp, WordPress Blogging themes. Bookmark the permalink.

Submit a ticket

If you are still unable to find a sufficient tutorial regarding your issue please use the following link to submit a request to our technical support team. We'll provide you with our help and assistance within next 24 hours: Submit a ticket