


- Web templates
- E-commerce Templates
- CMS & Blog Templates
- Facebook Templates
- Website Builders
FAQs
General Tutorials
Featured templates
MonsterONE Subscrioption


This tutorial shows how to install WordPress theme using Cherry Wizard.
CherryFramework 4. How to install theme using Cherry Wizard

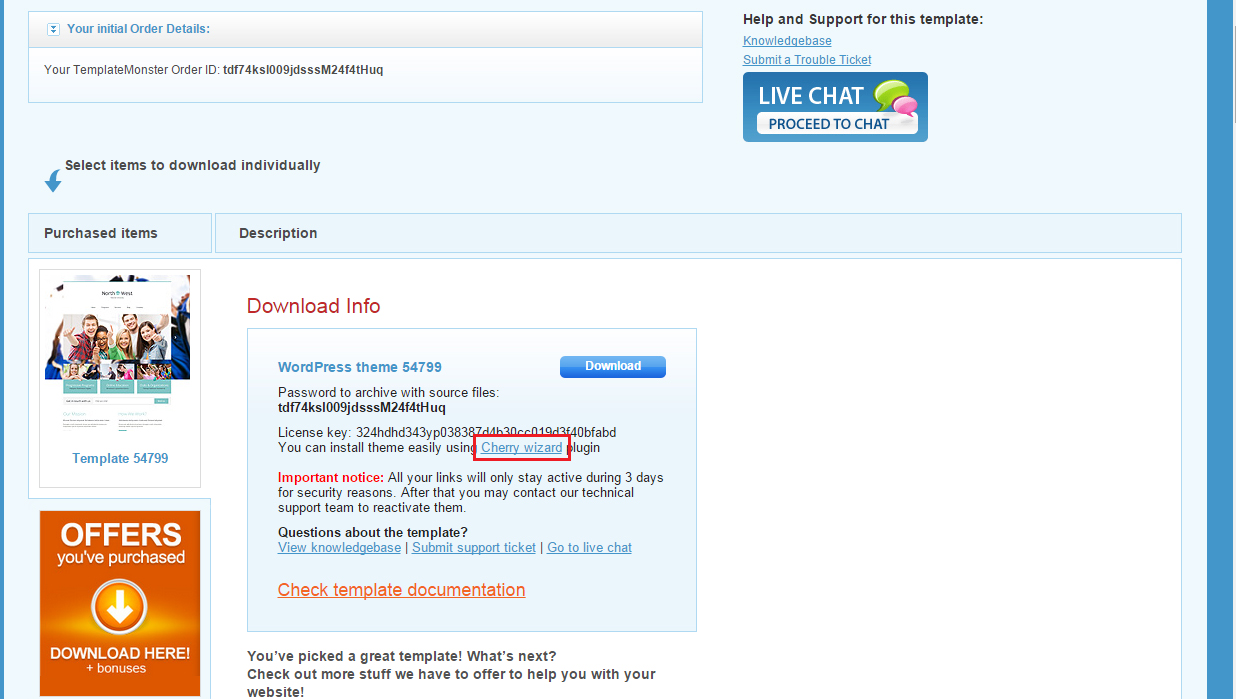
Open your template delivery page. You will find License key and link to Cherry wizard plugin. Download the plugin by clicking on link or opening link in a new window:
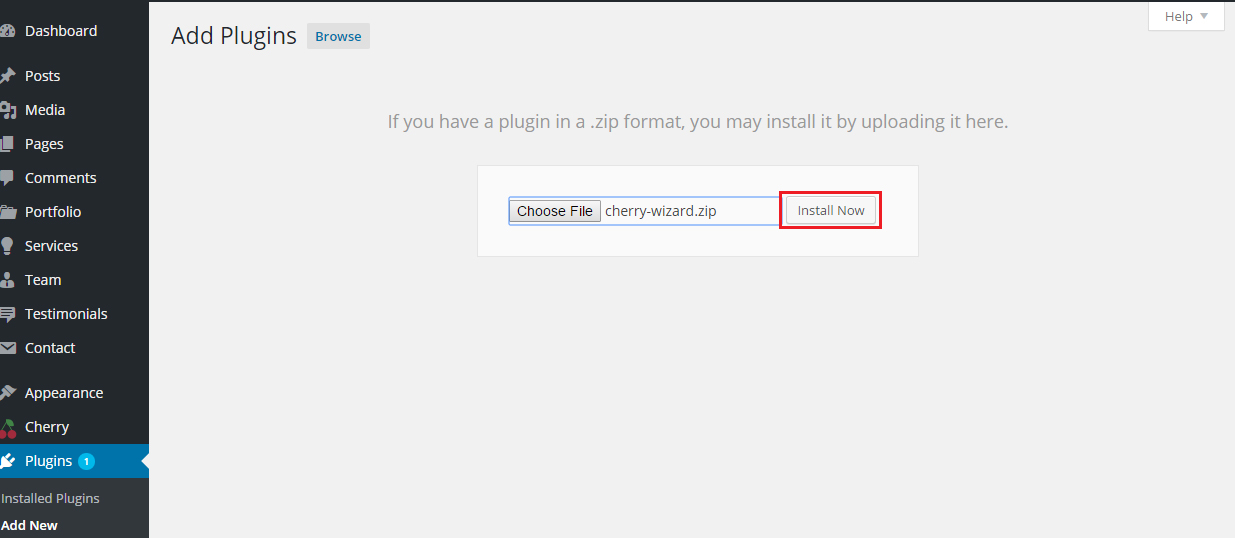
Open WordPress dashboard, go to Plugins – Add New. Click on Upload Plugin:

Choose plugin we have downloaded previously, install and activate it:

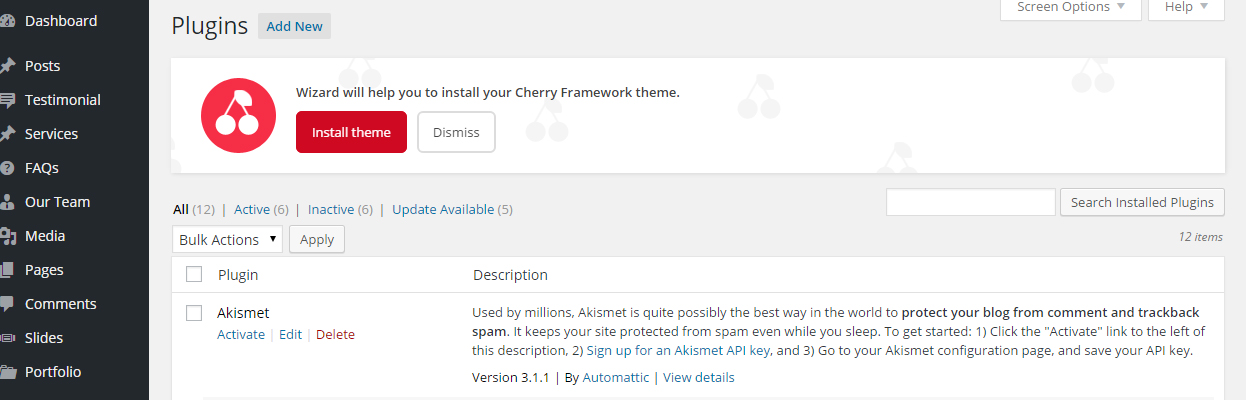
After activation you will see that Wizard offers to install the theme. Go ahead and select this option:
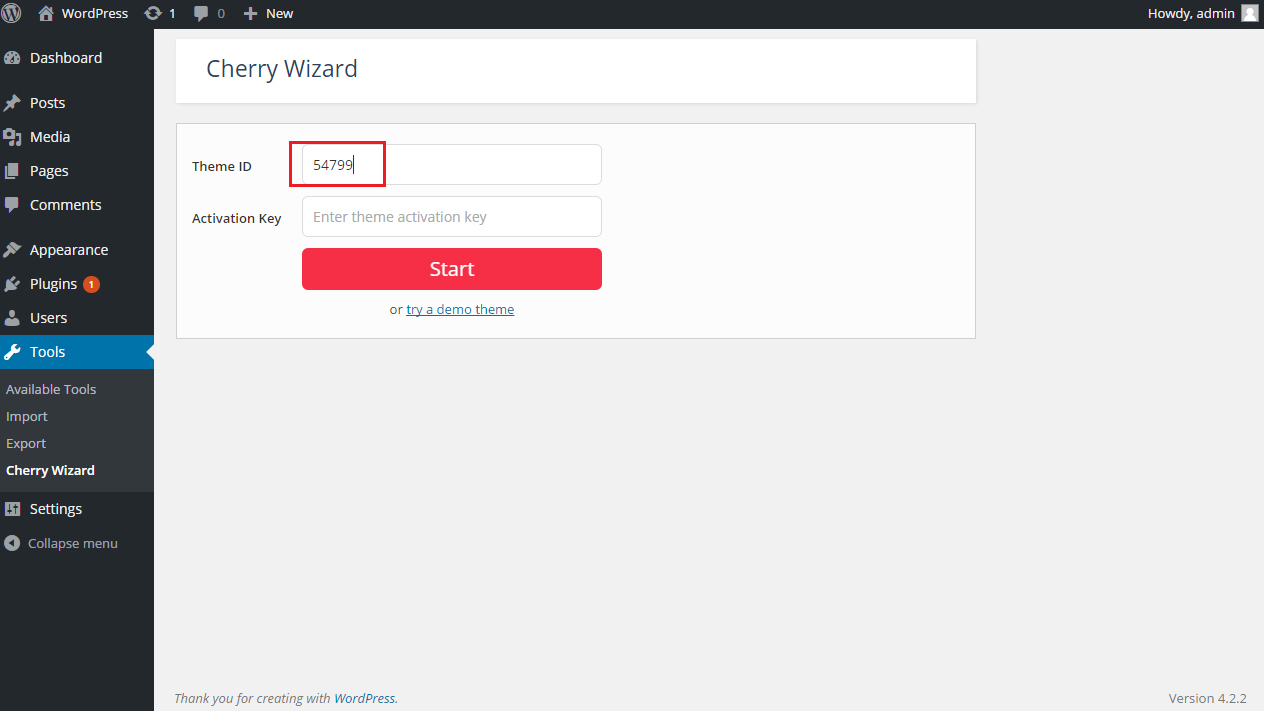
We can see two fields. Theme ID and Activation Key. Theme ID is template ID ( in most cases ID is a template number). Activation Key is specified on template delivery page:
Open template delivery page. Copy template number:

Paste it to Theme ID field:
Copy License key. Key is specified on template delivery page:

Paste it to Activation Key field. Click Start in order to begin installation process:

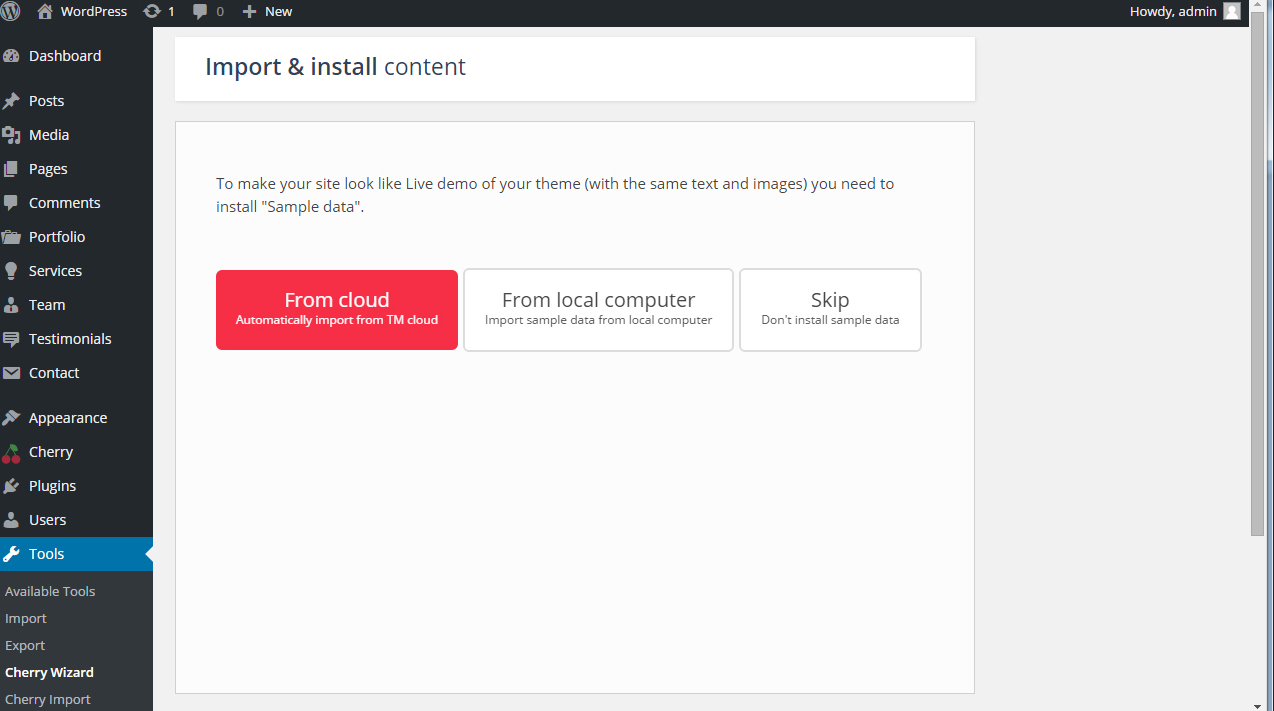
Theme is installed and activated. Now we should import sample data in order to make our installation look like live demo with sample content.
Click on From cloud button. Sample data will be automatically downloaded from cloud and imported to your WordPress:
We can see that zip file with sample data is uploaded. Click on Continue Install in order to perform sample data installation:

Sample data was successfully installed :

Check your site. We have installed theme using Cherry Wizard plugin:

Feel free to check the detailed video tutorial below:
