


- Web templates
- E-commerce Templates
- CMS & Blog Templates
- Facebook Templates
- Website Builders
FAQs
General Tutorials
Featured templates
MonsterONE Subscrioption


This tutorial shows you how to create a pricing table in the Monstroid theme.
Monstroid. How to create a pricing tableA pricing table can be created by outputting Services custom posts by the means of the Cherry Services shortcode.
.jpg)
In order to add a new service, you need to perform the following:
In your Dashboard go to Services -> Add New. Enter a title and add the content (optional):

Scroll down to the Services Options and fill out the Service features description and Price fields.
The Service features description has to be an HTML unordered list, for example:
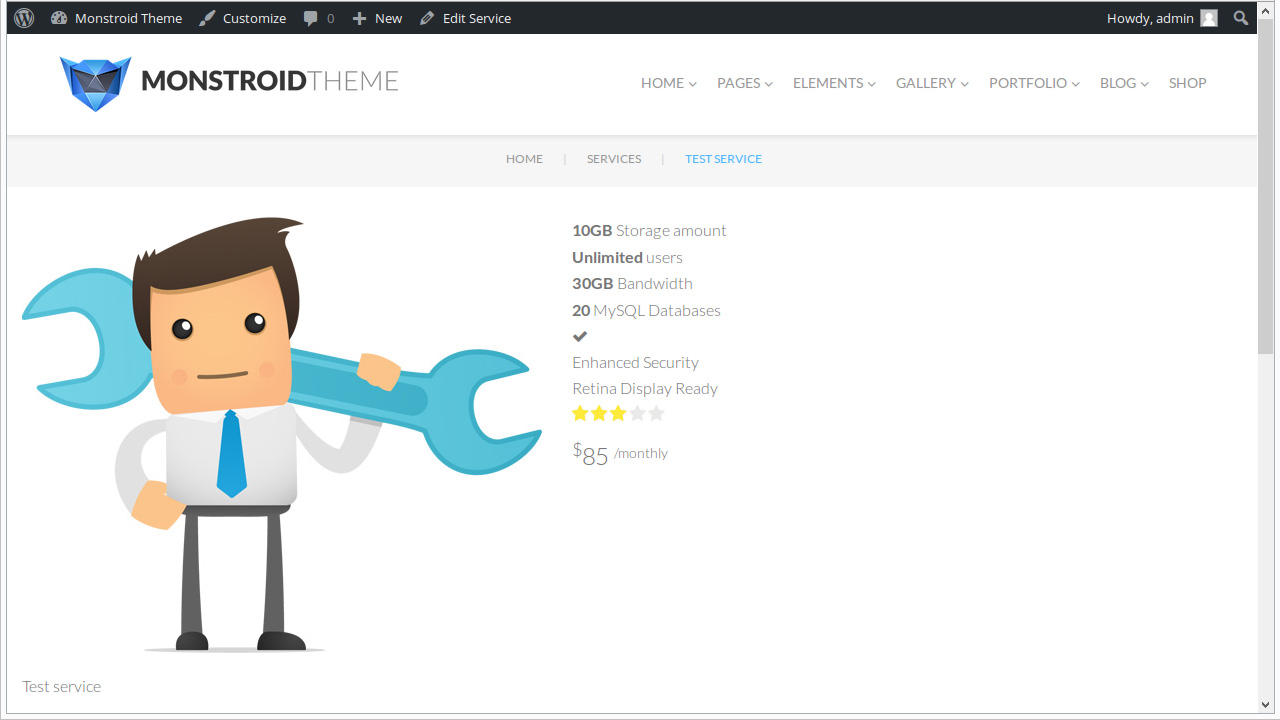
<ul>
<li><strong>10GB</strong> Storage amount</li>
<li><strong>Unlimited</strong> users</li>
<li><strong>30GB</strong> Bandwidth</li>
<li><strong>20</strong> MySQL Databases</li>
<li class="full"><i class="fa fa-check"></i></li>
<li class="full">Enhanced Security</li>
<li class="full">Retina Display Ready</li>
<li class="full"><div class="rating-wrap"><div class="rating"><div class="stars three"></div></div></div></li>
</ul>
The Price field should contain information about the price of the service. You can add HTML tags for a nicer look, for example:
<sup>$</sup>85 <sup class="small">/monthly</sup>

You can also specify the URL to order this service, it is optional. After you have filled out all fields and chosen additional options for your service post, assign it to a specific category like Price blocks and set the featured image.
Publish your new service post:
In order to add a pricing table, you need to perform the following:
In your Dashboard go to Pages -> Add New. Enter a title and add the content (optional). If you’d like to add a pricing table to an existing page, skip this step:

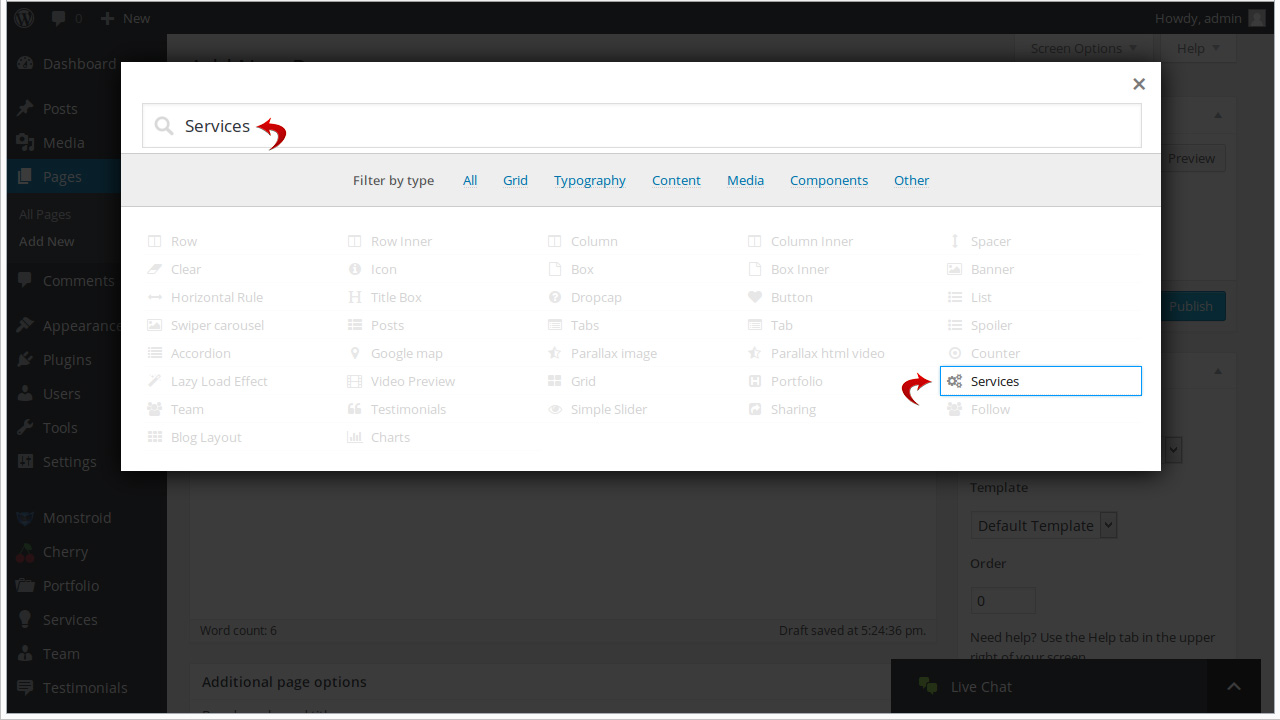
Click on the Insert shortcode button which is located above the content editor and to the right of the Add Media button. In the shortcode search bar enter “Services”. The Services option will be brought up to the front view. Select the option:
The Services shortcode has menu attributes which allow you to customize the pricing table to suit your needs. But before you turn a services grid into a pricing table, you need to specify a few necessary attributes for the shortcode.
Choose the Category which your price posts have. For example, the Price blocks category.
Set the Column class for each of the four device sizes. For example, if you’d like your pricing table to be displayed in one column on smart-phones and in tree columns on all other devices, choose the options 12-4-4-4.
Select the Shortcode template. Currently, we have 7 price templates:

After you have set all attributes for the Services shortcode, click on the Insert Shortcode button and Publish the page. You will get a nice-looking pricing table:

Feel free to check the detailed video tutorial below:
Monstroid. How to create a pricing tableWe would also recommend you to read our guide “How much does it cost to build a website?”
