


- Web templates
- E-commerce Templates
- CMS & Blog Templates
- Facebook Templates
- Website Builders
FAQs
General Tutorials
Featured templates
MonsterONE Subscrioption


The following tutorial will show you how to create new employee with the limited access in PrestaShop 1.6.x.
PrestaShop 1.6.x. How to add a new employee with the limited access
In PrestaShop you can add users that can access the admin panel and perform various actions there. Each profile has a set of permissions that determine what the users associated with that profile can do in the back office.
Log into your Prestashop admin panel.
Navigate to Administration -> Profiles.
Click Add new button and enter the profile name:

Click Save to save changes:

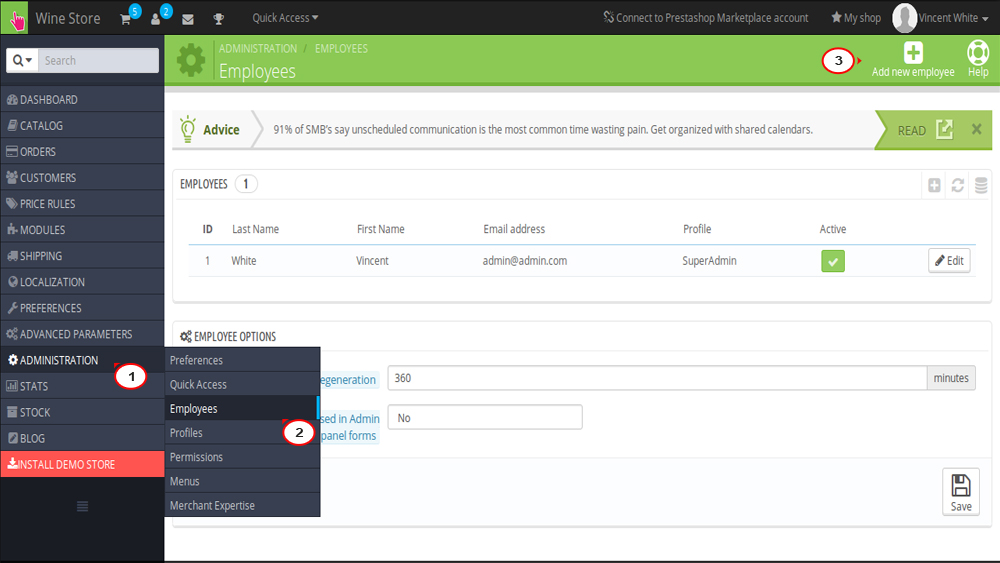
To add a new employee, go to Administration >Employees in the admin panel.
Click Add new employee button in the top right corner:
This will open the form for adding new employees:
First Name and Last Name – specify the first and last name of the employee.
Email address – in this field type the email address of the employee. That will be required for the login.
Password – type a password for the employee’s account.
Connect to PrestaShop – this option is enabled by default. This means that the account will be connected to PrestaShop server and as a result it will show the employee tips on how to better manage the store.
Default page – from this drop-down menu you can select the admin panel page that will be displayed when the employee logs into the back office. By default, the general dashboard page is displayed.
Language – From this drop-down menu you can select the default language for the account.
Theme – From this drop-down menu you can select the theme for the account that you’re creating/editing.
Admin menu orientation – By default, the admin menu is displayed on the left side of the screen. There’s an option to display it at the top instead.
Status – by default, this option is enabled which means that once the account is created the employee will be allowed to log into the back office. If you disable it, the employee will not be allowed to log in.
Permission profile – from this drop-down menu you can select the profile (or user role) of the employee. Each profile has its own set of permissions that define what the employees assigned to that profile are allowed to do. Let’s select our new profile.
Click Save button to save changes:

Go to Administration ->Permissions.
On the left side of the page that opens you’ll see the existing profiles listed. To see and modify the permissions of a profile, click on the tab for that profile.
Permissions are grouped in two panels. One lists the menus and sub-menus of the admin panel and the other one – the installed modules.
For each module there’s a checkbox View and another one Configure. When the one for viewing is marked, the employees will see the module in the module list, and when the one for configuring is marked, they will be allowed to configure its options.
For each menu there are a few checkboxes. Each checkbox represents a particular action: View, Add, Edit, Delete. If the checkbox is marked, employees belonging to that profile will be able to perform that action in the particular menu.
NOTE: In the row for each menu there’s also a checkbox All. When you mark it, all the checkboxes in the row will be marked.
To make it easier for you to configure the permissions, at the top of each column there are checkboxes for marking/unmarking all the checkboxes in a column.
Configure the new employee’s permissions in the required way. The configuration will be auto-updated:

That is the end of the tutorial. Now you know how to create the new employee with the limited access.
Feel free to check the detailed video tutorial below:
PrestaShop 1.6.x. How to add a new employee with the limited access
