


- Web templates
- E-commerce Templates
- CMS & Blog Templates
- Facebook Templates
- Website Builders
FAQs
General Tutorials
Featured templates
MonsterONE Subscrioption


This tutorial will show you how to increase the maximum upload size in php.ini file of any WordPress installation.
WordPress. How to increase maximum upload size
The error like File_”name” has failed to upload due to an error – This file exceeds the maximum upload size for this site is one the most common errors that occur in WordPress and other PHP-based programs that use the php.ini for certain settings. You will need to increase the allowed memory in your php.ini file.
The instructions below will show you how to fix the php memory error by adjusting the appropriate sections of your local files. There are 4 ways:
The first way is the following:
Log into your cPanel.
Scroll down to Files section and open the File Manager.
Select public_html root from the available ones.
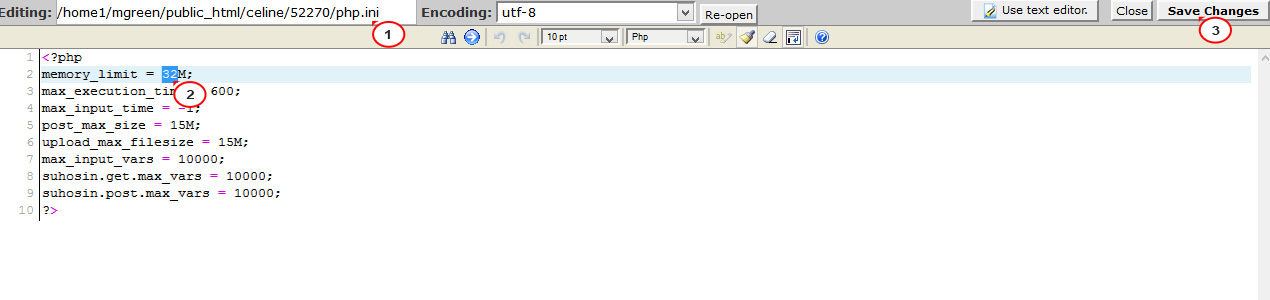
Locate php.ini file in your root. Click on the file name to edit it with File Manager editors:

Change the line in php.ini. If your line shows 32M, try to change it to 128M. Maximum amount of memory a script may consume is 128MB.
Click the Save Changes button to save your changes:
If you don’t have access to php.ini, try adding this to .htaccess file:
php_value memory_limit 64M


If you again don’t have access to php.ini, the third way is to add this line to your wp-config.php file:
	# Increasing memory allocated to PHP
	define('WP_MEMORY_LIMIT', '64M');


The forth and the last way out is creating your own php.ini file with the following line inserted and adding it to wp-admin folder:
memory_limit = 128M


Please remember that maximum uploads size settings depend, in most cases, on your server. Therefore, if none of the remedies presented in our tutorial helps, feel free to contact your hosting provider.
Feel free to check the detailed video tutorial below:
