- Web templates
- E-commerce Templates
- CMS & Blog Templates
- Facebook Templates
- Website Builders
PrestaShop 1.6.x. How to work with “TM Newsletter” module
September 2, 2015
PrestaShop 1.6.x. How to work with “TM Newsletter” module
This tutorial shows how to work with TM Newsletter module in PrestaShop 1.6.x:
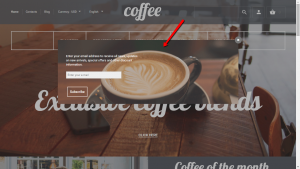
This module allows to add a popup to the home page suggesting site visitors to subscribe to your site newsletter.
-
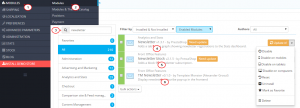
Open the admin section and navigate to Modules -> Modules and enter “newsletter” to the search.
You should see three enabled modules: Newsletter, Newsletter block and TM Newsletter. If one of them is not installed and disabled, you need to enable it as they are interrelated:
-
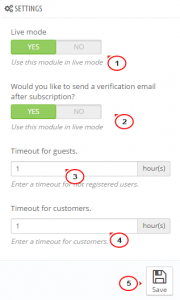
In Modules -> Modules -> TM Newsletter -> Configure you will be able to manage the module settings:
- Live mode – set it to Yes to enable the newsletter popup;
- Would you like to send a verification email after subscription?
– enable/disable subscription verification; - Timeout for guests – the number of hours before the popup appears once again for unregistered users;
- Timeout for customers – the number of hours before the popup appears once again for registered users.
-
Save the changes:
-
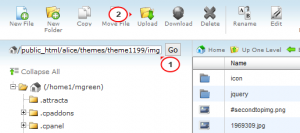
To change the background image, access your site folder on the server via FTP or through hosting cPanel.
-
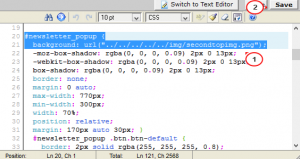
Open themes/themeXXX/css/modules/tmnewsletter/views/css/front.css and locate this part of code around Line 20:
#newsletter_popup {
          background: url("../../../../../img/secondtopimg.png");
As you see, the image used is secondtopimg.png and can be found in the themes/themeXXX/img folder:
-
Upload your image to themes/themeXXX/img under the same file name:
If you use different file name, i.e. different name and file extension, you need to change it in front.css.
-
-
To edit the default text, perform the following steps:
-
Navigate to Localization > Translations in your admin panel.
-
Select Installed modules translations, themeXXX (where XXX is your theme number), the needed language to edit and click on the Modify button:
-
Find tmnewsletter module translation section (use Ctrl+F for a quicker search) and click on the translations quantity to see all the tabs:
-
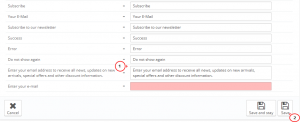
Replace the text in the fields with your own. For example, we will edit the original text:
Enter your email address to receive all news, updates on new arrivals, special offers and other discount information.
To the following:
Enter your email address to receive all the latest news!!!
-
Save the changes:
-
-
Refresh the site to see the updated newsletter popup:
You may need to clear Smarty cache and browser cache to see the changes on the site.
Feel free to check the detailed video tutorial below:


