- Web templates
- E-commerce Templates
- CMS & Blog Templates
- Facebook Templates
- Website Builders
Drupal 7. How to use Views module and edit/configure it
June 2, 2012
This tutorial is going to show you how to use a Views module (its Views 3 revision) on your Drupal 7 website and edit/configure it.
The Views module provides a flexible way to control the way lists and tables of content, users, taxonomy terms, photo galleries, slideshows etc are presented on your site. Each list managed by the views module is called a "view", and the output of a view is called a "display". With the help of the administrative interface the module allows you to pull nodes from the database and display them as you see fi t on your site.
The module can be downloaded at http://drupal.org/project/views
Once it is installed and enabled, go to the top menu Modules, scroll down to Views and make sure that Views and Views UI are checked.
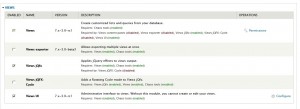
Then go to Structure -> Views. On this page you can see the views that are already created (for instance, if you installed the template using the sample demo profile) and those yet to be activated if you click “enable” in the “Operations” column.
The best way to learn how this module works is to create a new View. On the same page, click “Add new view”.
Let’s say you want to create a list of Recent News embedded into to a block on your site.
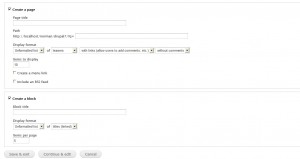
On the Add new view page you need to specify
- a unique View name (e.g. Recent News) and a machine name (cannot be changed once saved, e.g recent_news);
- the View description to provide your view with a short administrative description, explaining what it does or where it is used (e.g A list of recent news);
- Select what kind of site data should be displayed in the setting starting with Show (e.g. Content = nodes). You may also limit the view to display only certain content types (article, blog entry, gallery etc). You can also select how the view should be sorted.
If you want your list to embedded into a page check Create a page. When checked, this option allows you to specify your new page title and the path and to add a menu link to it right away.
If you would rather like your view to be embedded into a block on a page, uncheck Create a page andcheck Create a blog. When checked, this option allows you to specify your block title. If you use this option, you can later find this block under Administration » Structure» Blocks.
The both options allow you to select the Display format of your view and how many items you want to display on your page/block.
Scroll down to the bottom of the page and click Continue & Edit or Save & Exist (then you can find your view under Administration » Structure » Views).
On the The Views edit page we recommend that you scroll down right away and check “Auto Preview” to be able to see the changes you are making.
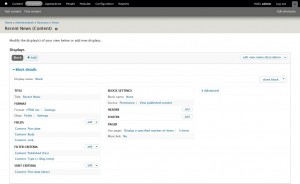
Let us take a overlook at the display settings of the newly created view that we embedded into a blog you have there
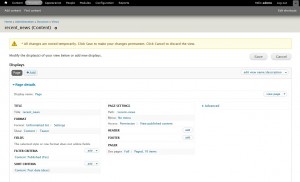
For the view embedded into a page the settings are the same with the exception of a few fields:
If you click on “Add” next to the highlighted name of the current display, it will give you an option to add new displays of different types: attachment, block, feed and page. For one view you can have multiple displays.
To the right you can find another option to “edit view name/description” which as clicked allows you to
- Change the name of the current view and change/ add a tag or description.
- Analyze the view;
- Clone view; When you click on the clone link on the upper right, all the options in the current view will copy to a new view, which can be given a new name and edited further.
- Export view You can the copy and paste the code from a view into a module or something else. It is a array with all options for that view
Let’s proceed to other options on this page:
Display name (e.g. Blog or Page) allows you to change the name of the view to for admin needs, that is what you enter here will be not be visible to your site visitors.
Then goes the Title of the blog/page etc with the option to change it.
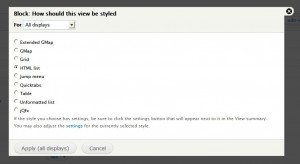
Format shows the format that is currently selected (e.g. Html List). When clicked, it allows you to select a different way the content is formatted:
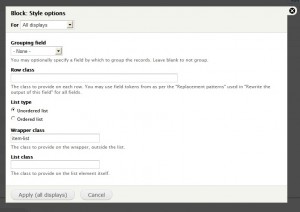
Click on “Settings”next to it in order to change them for the currently selected format. E.g.:
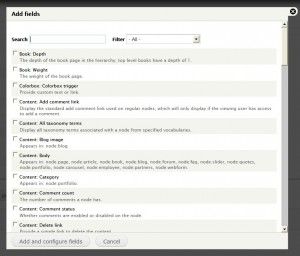
The Fields option allows you to select individual fields pulled from the content. Click “add” next to it to add additional fields.
To easily narrow down the results, the you can use the Search field. By having checked the fields you need, you can add as many as you need at a time.
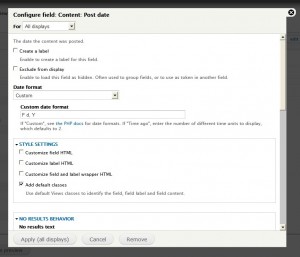
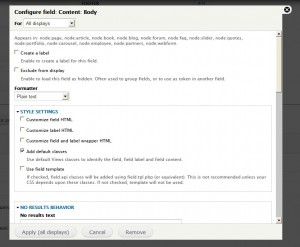
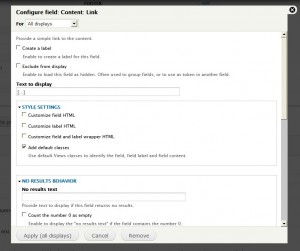
For the Recent News we are going to add the following:
Content: Post date
Content: Body
Content: Link
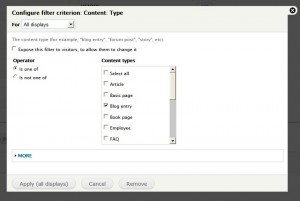
Filter criteria gives you an option to determine which content specifically gets displayed. For example , if under the Filter criteria you have
Content: Published (Yes). Content: Type (= Blog entry)
This means the option allows you to display only the Blog entries which are published. To add more of such criteria, click on “add”:
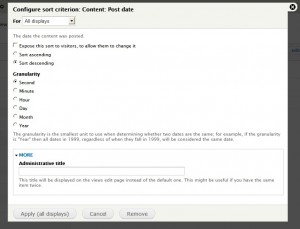
The option Sort Criteria shows what way the data is currently sorted (e.g Content: Post date (desc) that means the date when the data was created and allows you configure it when clicked:
Click “add” to add more of such criteria.
Block settings: iIf you sleeted the page option for your view, here you can set the path, select the menu item pointed to page with the current view and use and use the Access to specify permissions for certain types of users to allow them to access the view.
In case of a view embedded into a block, under the Settings you can specify the Block name and Access (user permissions).
The Header and Footer options allows you to specify what content you want to show above and below the current view accordingly.
Pager allows you to add a pager to your view of a specific type and specify how many items you want to use per page.
More Link allows you to specify if the current display will provide a “more” link or not, if you are obviously not going to use the pager.
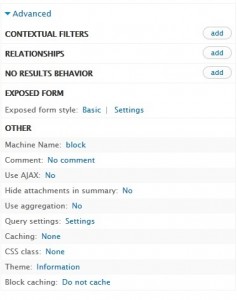
Click on the Advanced to reveal different options to set Advanced configurations in your View:
- Contextual filters
- The Ajax feature that allows you to enable/disable Ajax for the view (e.g. your site visitors can use the pagination and the page will not get refreshed every time).
- Caching is recommended to be set to yes if your view has a great number of items
- Relationships
- Exposed Form
- others.
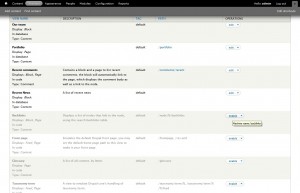
When you are ready with your configuring the view, click the “Save” button at the top. Since in this example we have created a view embedded into a block , we need to go to the top menu Structure -> Blocks and locate the one that was created together with the view under Disabled
e.g
View: Recent news
Click on “configure” . Under the Region settings specify in which themes and regions this block is displayed. E.g. Bottom Content.
Scroll down and click save block.
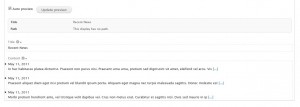
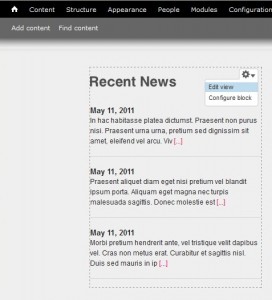
Go to the page where you placed your click and check how the final result looks.
You can continue modifying your view if you mouse over the top right corner of the content and select “Edit View”:
Feel free to check the detailed video tutorial below:


