


- Web templates
- E-commerce Templates
- CMS & Blog Templates
- Facebook Templates
- Website Builders
FAQs
General Tutorials
Featured templates
MonsterONE Subscrioption


We are glad to provide you with useful guide on working with gallery page in JS Animated templates that shows how to edit text, images and change page layout.
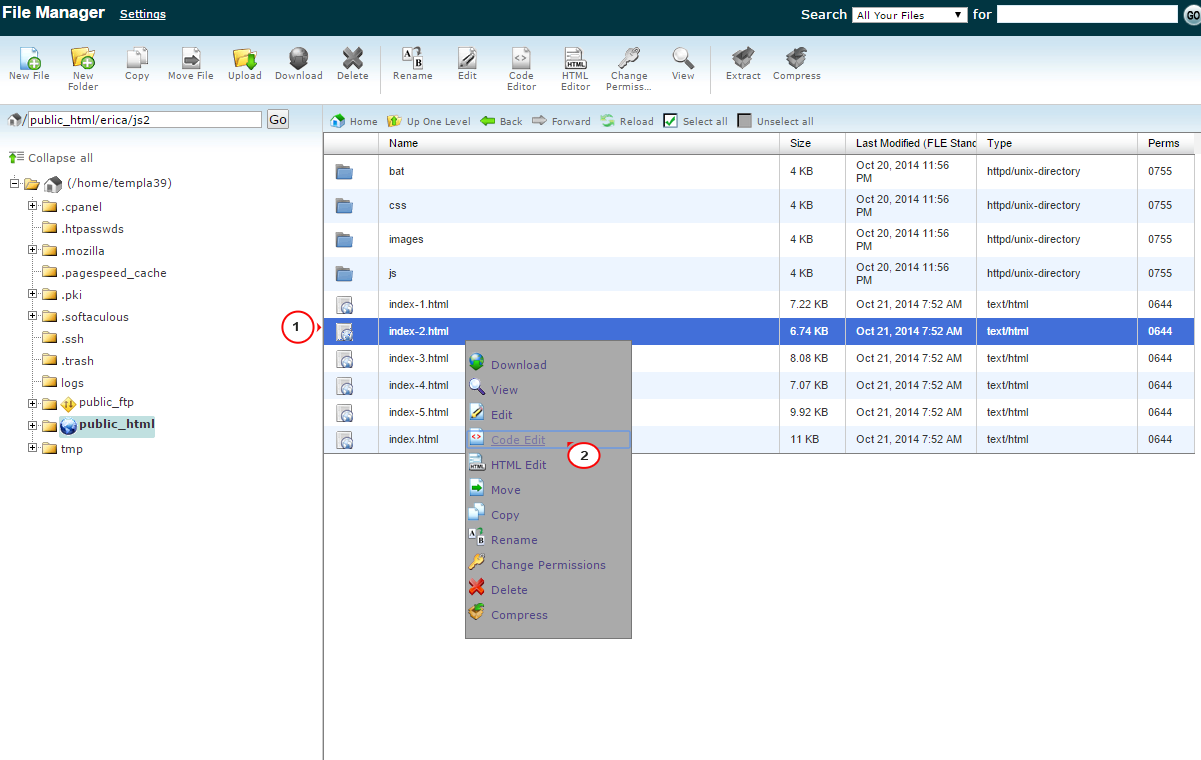
JS Animated. How to work with gallery pageIn order to work with gallery page, you should go to FTP or File Manager at Hosting CPanel and edit the file that is used for your gallery page. In our example it will be index-2.html file. It may also be downloaded to your computer, edited with any code editor like Notepad++, Dreamweaver, etc. and uploaded back to server after saving changes:
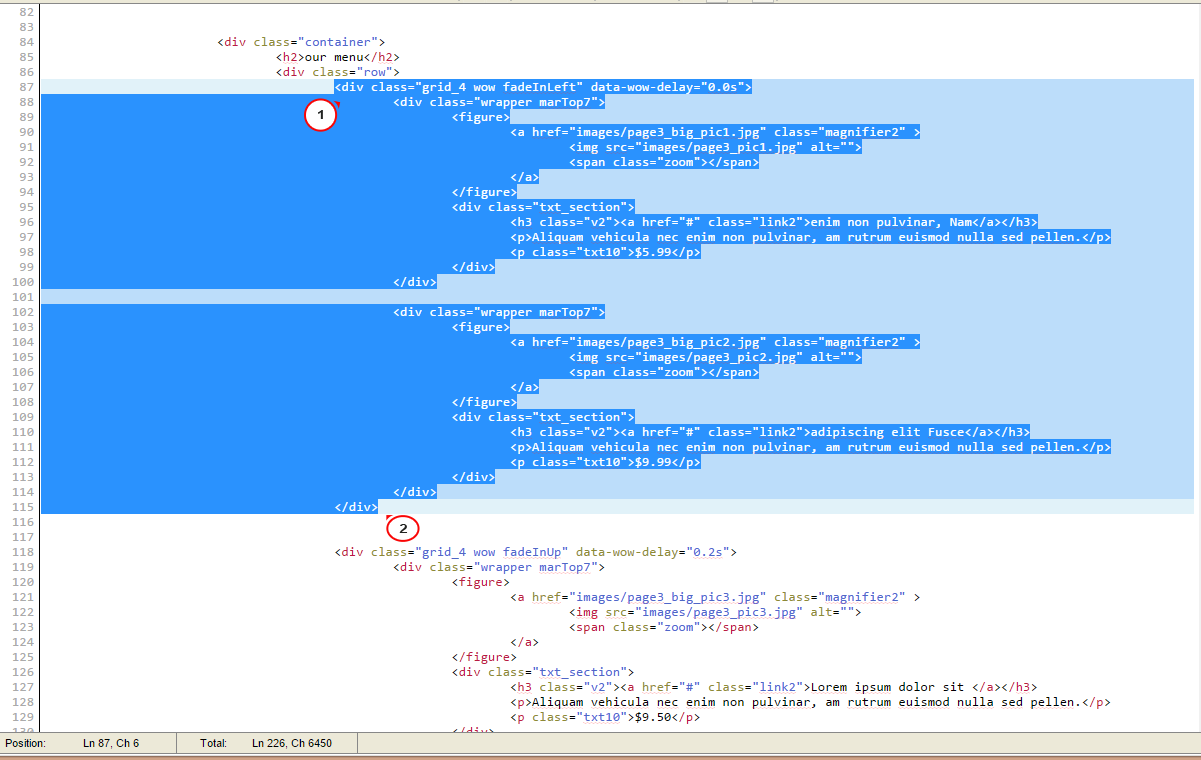
Page structure:
The page contains code for rows that usually include 12 grid columns each. Code for your page content (like images and text) is wrapped by these selectors with grid_X (or spanX) classes, where X defines number of grid columns used for your content column on the page. For 3 columns grid this kind of code structure is used:
			<div class="row">
				<div class="grid_4"> 1 column content here </div>
				<div class="grid_4"> 2 column content here </div>
				<div class="grid_4"> 3 column content here </div>
			</div>

In case you need to change number of columns on the page, you should copy the whole code for grid section and insert it within “row” element. For example, let us increase number of columns on the menu page. Change X number in spanX or grid_X elements and make sure to keep 12 grid columns per row. The code should have the following structure:
			<div class="row">
				<div class="grid_3"> 1 column content here </div>
				<div class="grid_3"> 2 column content here </div>
				<div class="grid_3"> 3 column content here </div>
				<div class="grid_3"> 4 column content here </div>
			</div>
Within the grid_X (or spanX) element you may find code for each content part – usually it is the image and text caption. Below is the code structure for 2 images with the respective captions:
			<div class="grid_4">
				<div class="wrapper">
					<figure> 1 image code here </figure>
					<div class="txt_section">1 image caption code here</div>
				</div>

				<div class="wrapper">
					<figure>2 image code here</figure>
					<div class="txt_section"> 2 image caption code here </div>
				</div>
			</div>
If you need to add an image to the column, just copy the code for one image with caption and add it at the bottom right under the code for the last image (to insert new one at the bottom).
Image code structure looks like the following:
			<figure>
				<a href="path to large image version here(for lightbox)">
					<img src="path to thumbnail" alt="">
					<span class="zoom"></span>
				</a>
			</figure>
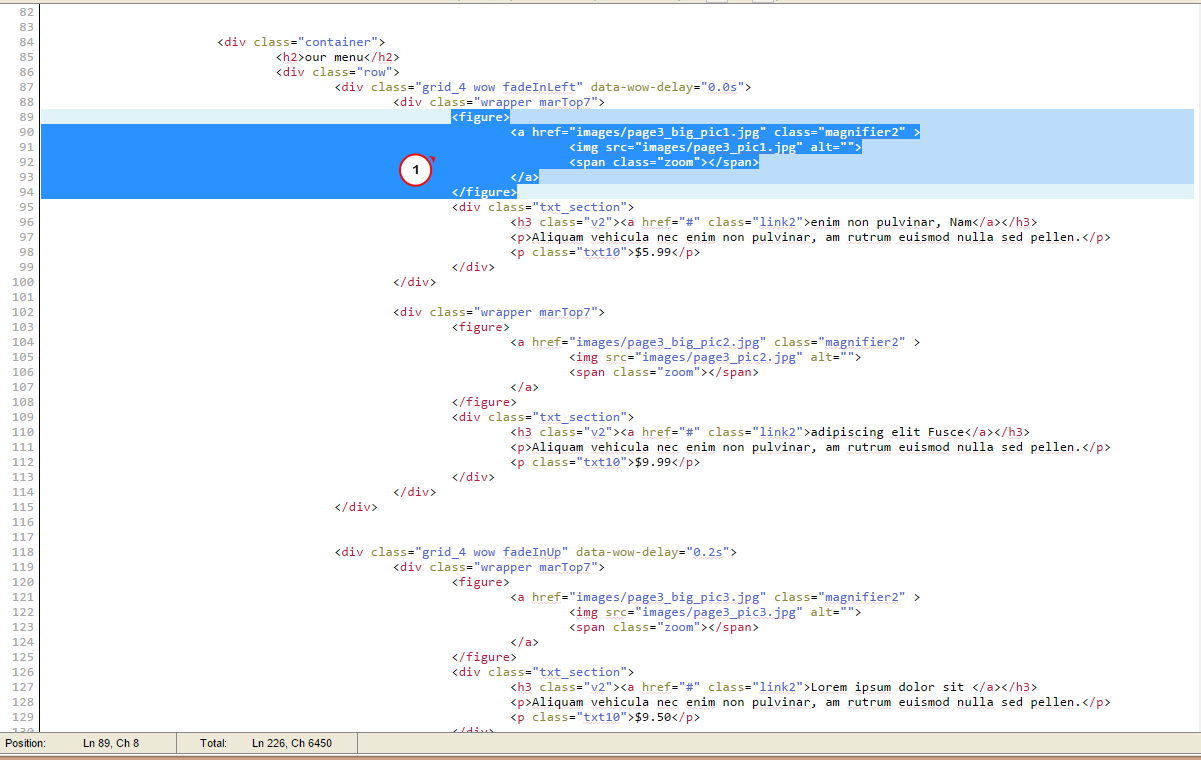
In case you need to disable the lightbox on the page, you should just replace path of large image version with some link that you need the image to redirect to when it is clicked and remove <span class=”zoom”></span> part. In order to replace the image that is used for lightbox or thumbnail itself, change src=”” parameter value in img line directly pasting path to your new image there.
Text part in general looks like the following:
			<div class="txt_section">
				<h3 class=""><a href="#" class="link2">Title goes here</a></h3>
				<p>Some caption may be inserted here.</p>
				<p class="">Some additional text.</p>
			</div>
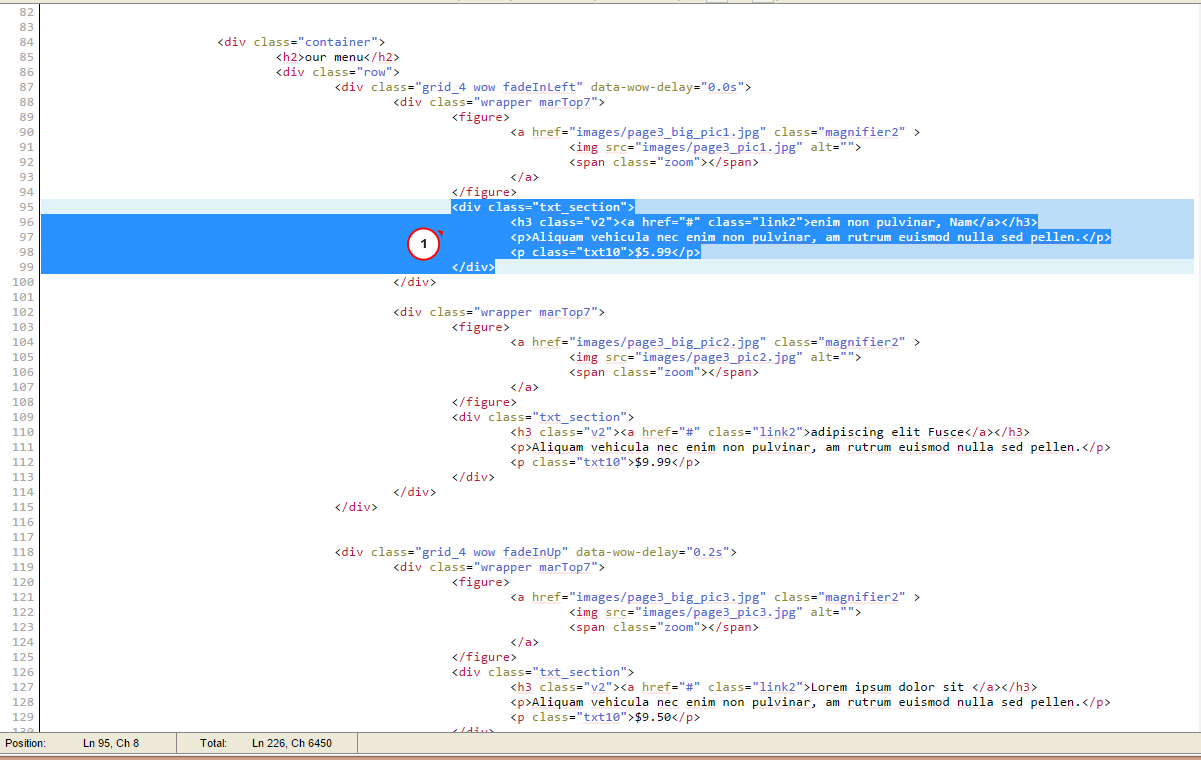
Here you may change image title, replace # in href=”#” with link on title, change general caption text, add your new one or delete it completely if needed.
Feel free to check the detailed video tutorial below:
JS Animated. How to work with gallery page