- Web templates
- E-commerce Templates
- CMS & Blog Templates
- Facebook Templates
- Website Builders
WordPress Blogging Themes. How to add theme localization
April 12, 2016
This tutorial shows how to add theme localization in WordPress Blogging Themes.
WordPress Blogging Themes. How to add theme localizationIn order to start adding a theme localization, please download and install PoEdit software at https://poedit.net/download.
Connect to server via FTP or open cPanel File manager. Download the wp-content/themes/your_theme/languages/your_theme.pot file. Please note that your_theme is the theme folder name on server.
-
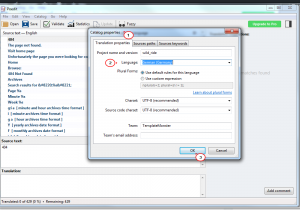
Next, open the PoEdit software, click the Create new translation button and select corresponding language in the Translation Language field. Next, navigate to Catalog -> Properties and make sure that correct language is selected:

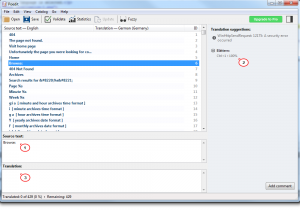
Start adding your translations into the Translation field. You can type in translations or use suggestions on the right:

-
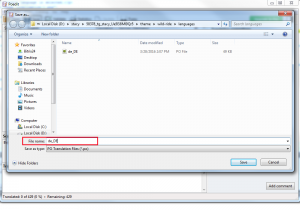
Click the Save button at the top of PoEdit and save file with the corresponding language code. Feel free to use the following link to find correct language code: https://make.wordpress.org/polyglots/teams/.

-
After saving the changes, .po and .mo language files will appear in the directory you’ve downloaded language file to. Upload these files to the wp-content/themes/your_theme/languages folder on server.
-
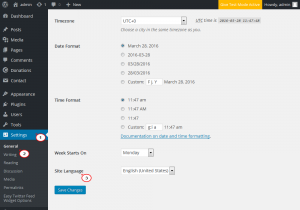
Navigate to WordPress Dashboard and open the Settings -> General tab, scroll down and select the corresponding language in the Site Language field, save changes:

-
Refresh your website front-end to see that translation was added successfully.
Feel free to check the detailed video tutorial below:
WordPress Blogging Themes. How to add theme localization


